Showing posts with label Cake. Show all posts

Saturday, February 9, 2013

Peanut Butter and Jelly Loaf

We are in the midst of a blizzard here in Maine. Daycare was closed for a half day yesterday so Abe and I whipped this up after naptime. As you probably know and agree, snowy days are perfect for baking. I love baking with my two year old.

This loaf came out excellent. I used Trappist strawberry jam made in Massachusetts. I did end up tenting it with foil toward the end and baking it another 15 minutes, it wasn't done in the middle after 50 minutes.
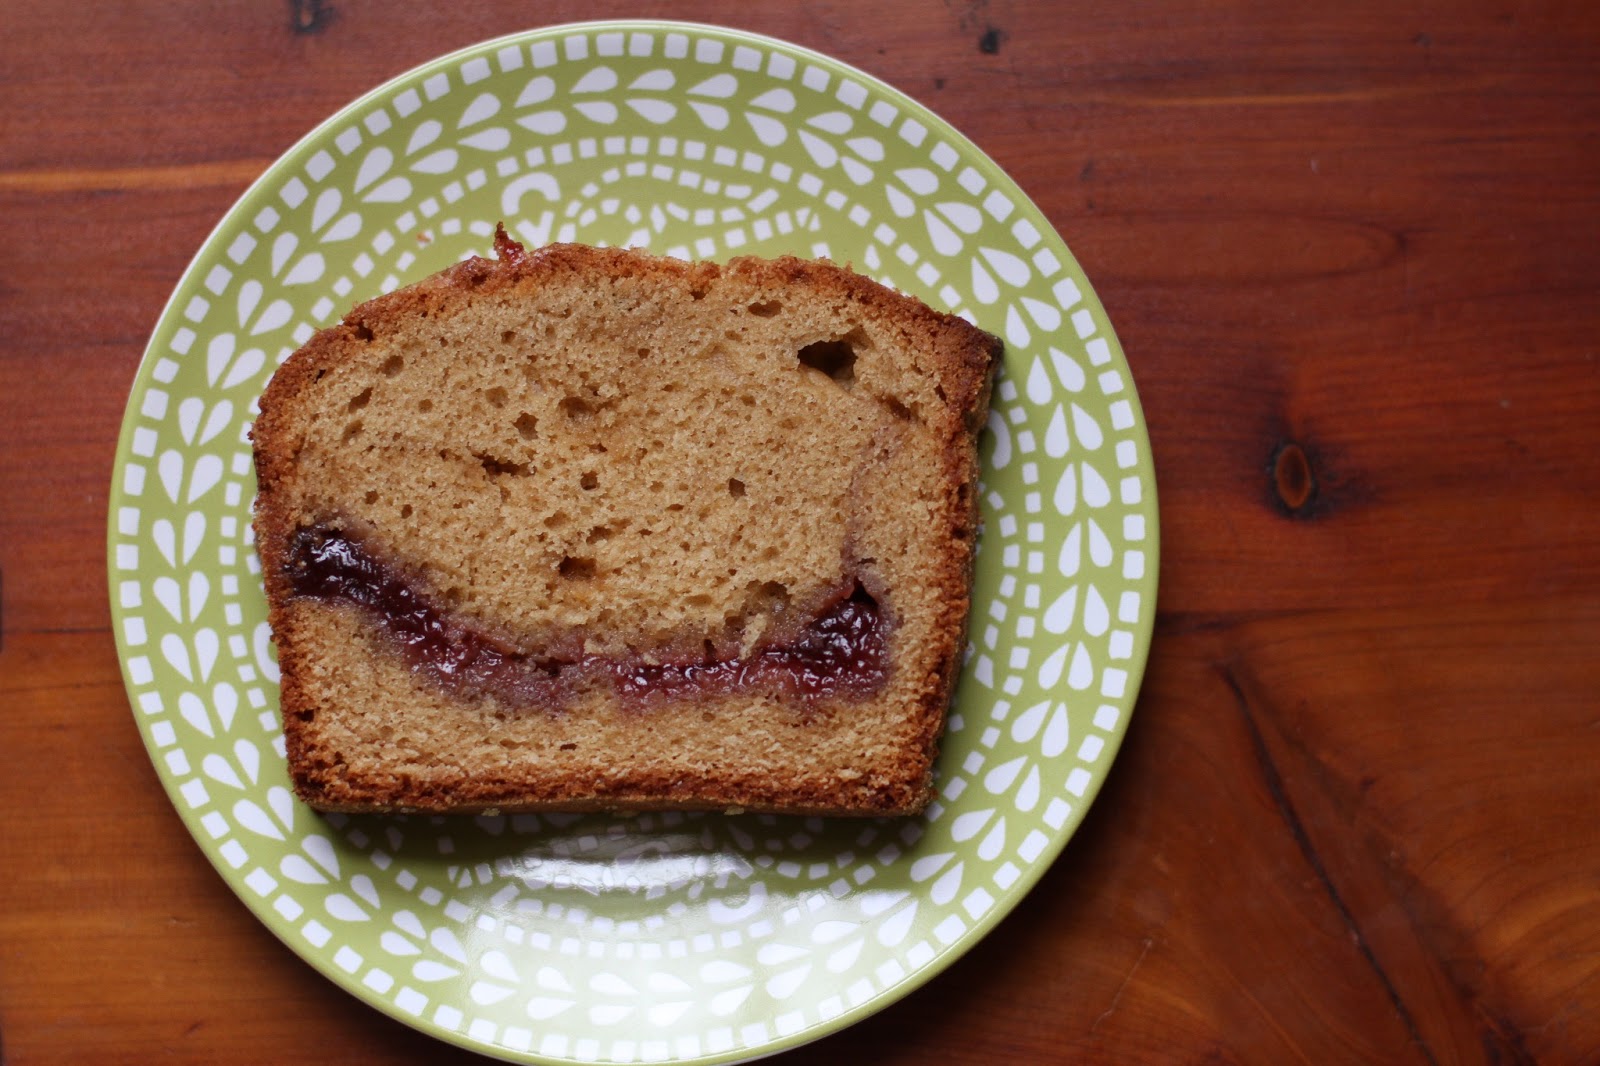

Peanut Butter and Jelly Loaf
Source: 17 and Baking


1 1/2 cups all-purpose flour
1/2 tsp baking powder
1/4 tsp baking soda
1 tsp salt
1/2 cup whole milk, room temperature
1 tsp vanilla extract
3/4 cup creamy, all natural peanut butter (with no added palm oil)
2 oz (1/2 stick) butter, room temperature
3/4 cup granulated sugar
1/2 cup packed dark brown sugar
3 eggs, room temperature
1/2 cup jam

Preheat the oven to 350 F. Butter a 9×5″ loaf pan and coat it with sugar.
Sift the flour, baking soda, baking powder, and salt into a small bowl. In another bowl, stir the jam to break it up and get it loose.
In the bowl of a stand mixer, cream the peanut butter, butter, and sugars on medium high speed for a full five minutes. The mixture won’t get light and fluffy and the sugar won’t dissolve, but the mixture will be less grainy.
Beat in the eggs one at a time, mixing well after each one and scraping down the sides of the bowl.
Beat in half the flour mixture, then the milk and vanilla extract, then the rest of the flour, scraping the sides of the bowl. The batter will be thin. Pour half the batter into the loaf pan and dollop with jam. Pour the rest of the batter over the jam and sprinkle the top with large grain sugar.
Bake the loaf for about 50 minutes. The time for this one really depends on your oven, so keep checking. If the edges start to get too brown, loosely tent some tin foil over the top and keep baking. Then bake for another 10-20 minutes or until a toothpick in the middle comes out clean.
Cool in the pan for 15 minutes, then turn the cake out onto a cooling rack and let cool completely.

Wednesday, February 6, 2013

Peanut Butter Chocolate Chip Cupcakes with Peanut Butter Frosting

PEANUT BUTTER.

I like to scream it.

Do it with me.

PEANUT BUTTER!

CHOCOLATE!

They should just run off and get married.

I made these on a whim and shared them with my pregnant friend. These were fantastic. Super moist muffins with a bit of a crunchy/crackly top and then a super soft creamy frosting. I froze a few and defrosted one last night - still very good!


Peanut Butter Chocolate Chip Cupcakes with Peanut Butter Frosting
Source: Recipe Snobs
Yield: 12 cupcakes

1 cup unbleached all purpose flour
1 tsp baking powder
1/4 tsp salt
6 tbsp unsalted butter, at room temperature
3/4 cup smooth all natural peanut butter, at room temperature
1/2 cup packed brown sugar
1/2 cup sugar
2 large eggs
1 tsp vanilla extract
1/2 cup whole milk
2 cups semi-sweet chocolate chips

Peanut Butter Frosting
6 ounces unsalted butter, room temperature
1/2 cup confectioners' sugar
1/2 tsp salt
1 cup creamy peanut butter, natural (or if you want a smoother look, go not-natural)
1/2 tsp pure vanilla extract
1/2 cup whole milk

Preheat oven to 350.

Line 12 cup muffin pan.

Combine the milk and vanilla in bowl. Combine flour, powder and salt in another bowl.

Cream butter and peanut butter together. Add the sugars and then the eggs. 

Alternate adding the dry and wet ingredients, starting and ending with the dry.

Fold in the chocolate chips. 

Divide batter evenly among muffin cups. Bake for 22 minutes and cool completely.

For the frosting, combine the powder sugar and salt in one bowl and the milk and vanilla in another bowl. Cream the butter and peanut butter until really smooth and creamy. Add the powder sugar followed by the milk and vanilla. Beat until light and fluffy. Pipe or spread onto cooled cupcakes.

Saturday, January 26, 2013

Chocolate Cupcakes with Peanut Butter Frosting

My friends have been talking about cake all week. And I had just curbed my cake craving by making a chocolate cake with chocolate frosting. But my word I fell right into it again. The more those girls talked about cake the more I wanted/needed it!

I figured that I would make cupcakes since I recently bought some very fancy (expensive) pans from William Sonoma. I knew I wanted chocolate cake but it took me a while to decided on peanut butter frosting. Then I had to decide on WHICH peanut butter frosting. (Nothing is simple). I decide on Ina Garten's frosting recipe because I find her trustworthy. She didn't let me down. The frosting is peanut buttery but light and fluffy and smooth as can be. Very wonderful.

I chose to make my normal chocolate cake from Cook's Illustrated, good stuff but I think next time I will try making Ina's cake into cupcakes and see how they turn out.


Chocolate Cupcakes
Source: Cook's Illustrated
Yield: 24 cupcakes or 2 round cakes


12 Tablespoons (1 1/2 sticks) unsalted butter, very soft, plus extra for greasing pans
1 3/4 cups all-purpose flour, plus extra for dusting pans
4 oz unsweetened chocolate, chopped
1/4 cup dutch-processed cocoa powder
1/2 cup hot water
1 3/4 C sugar
1 1/2 teaspoons baking soda
1 teaspoon table salt
1 cup buttermilk
2 teaspoons vanilla extract
4 large eggs, plus 2 large egg yolks

Adjust oven rack to middle position; heat to 350 degrees.  Grease two 9-inch round by 2 inch high cake pans with butter; dust pans with flour and knock out excess.  Combine chocolate, cocoa powder, and hot water in medium heatproof bowl; set bowl over saucepan containing 1 inch of simmering water and stir with rubber spatula until chocolate ins melted, about 2 minutes.  Add 1/2 cup sugar to chocolate and stir until glossy, 1-2 minutes.  Remove bowl from heat and set aside to cool.

Whisk flour, baking soda, and salt in medium bowl.  Combine buttermilk and vanilla in small bowl.  In bowl of stand mixer fitted with whisk attachment, whisk eggs and yolks on medium-low speed until combined, about 10 seconds.  Add remaining 1 1/4 C sugar, increase speed to high, and whis until fluffy and lightened in color, 2-3 minutes.  Replace whisk with paddle attachment.  Add cooled chocolate mixture to egg/sugar mixture and mix on medium speed until thoroughly incorporated, 30-45 seconds, pausing to scrape down sides of bowl with rubber spatula as needed.  Add softened butter 1 tablespoon at a time, mixing about 10 seconds after each addition.  Add about 1/3 of flour mixture; followed by half of buttermilk mixture mixing until incorporated after each addition (about 15 seconds.)   Repeat using half of remaining flour mixture and all of remaining buttermilk mixture (batter may appear separated.) Scrape down sides of bowl and add remaining flour mixture; mix at medium low speed until batter is thoroughly combined, about 15 seconds.  Remove bowl from mixer and fold batter once or twice with rubber spatula to incorporate any remaining flour.  Divide batter evenly between prepared cake pans; smooth batter to edges of pan with spatula.

Bake cakes until toothpick inserted into center comes out with a few crumbs attached, 25-30minutes.  Cool cakes in pans 15 minutes, then invert onto wire rack.  Cool cakes to room temperature before frosting, 45-60 minutes.

Peanut Butter Frosting
Source: Ina Garten
1 cup confectioners' sugar
1 cup creamy peanut butter
5 tablespoons unsalted butter, at room temperature
3/4 teaspoon pure vanilla extract
1/4 teaspoon kosher salt
1/3 cup heavy cream

Place the confectioners' sugar, peanut butter, butter, vanilla, and salt in the bowl of an electric mixer fitted with a paddle attachment. Mix on medium-low speed until creamy, scraping down the bowl with a rubber spatula as you work. Add the cream and beat on high speed until the mixture is light and smooth.


Sunday, January 20, 2013

Chocolate Cake with Chocolate Frosting

This is such a classic cake. Chocolate on chocolate. A hint of coffee. Moist. Buttery.

I had to give it to my friends so I could get it out of my house!!

The only thing that happened here is that my cake fell in the middle. This never happens to me. I am not sure if I didn't mix it enough or if I should blame my new oven that I am getting used to. Either way, that just meant more frosting to fill the gap in the middle. No mistakes, just opportunities!


Classic Chocolate Cake with Chocolate Frosting
Source: Ina Garten


Butter, for greasing the pans
1 3/4 cups all-purpose flour, plus more for pans
2 cups sugar
3/4 cups good cocoa powder
2 teaspoons baking soda
1 teaspoon baking powder
1 teaspoon kosher salt
1 cup buttermilk, shaken
1/2 cup vegetable oil
2 large eggs, at room temperature
1 teaspoon pure vanilla extract
1 cup freshly brewed hot coffee

Preheat the oven to 350 degrees F. Butter two 8-inch x 2-inch round cake pans. Line with parchment paper, then butter and flour the pans.

Sift the flour, sugar, cocoa, baking soda, baking powder, and salt into the bowl of an electric mixer fitted with a paddle attachment and mix on low speed until combined. In another bowl, combine the buttermilk, oil, eggs, and vanilla. With the mixer on low speed, slowly add the wet ingredients to the dry. With mixer still on low, add the coffee and stir just to combine, scraping the bottom of the bowl with a rubber spatula. Pour the batter into the prepared pans and bake for 35 to 40 minutes, until a cake tester comes out clean. Cool in the pans for 30 minutes, then turn them out onto a cooling rack and cool completely.

Place 1 layer, flat side up, on a flat plate or cake pedestal. With a knife or offset spatula, spread the top with frosting. Place the second layer on top, rounded side up, and spread the frosting evenly on the top and sides of the cake.

Chocolate Frosting:
6 ounces good semisweet chocolate (recommended: Callebaut)
1/2 pound (2 sticks) unsalted butter, at room temperature
1 large egg yolk, at room temperature
1 teaspoon pure vanilla extract
1 1/4 cups sifted confectioners' sugar
1 tablespoon instant coffee powder

Chop the chocolate and place it in a heat-proof bowl set over a pan of simmering water. Stir until just melted and set aside until cooled to room temperature.

In the bowl of an electric mixer fitted with a paddle attachment, beat the butter on medium-high speed until light yellow and fluffy, about 3 minutes. Add the egg yolk and vanilla and continue beating for 3 minutes. Turn the mixer to low, gradually add the confectioners' sugar, then beat at medium speed, scraping down the bowl as necessary, until smooth and creamy. Dissolve the coffee powder in 2 teaspoons of the hottest tap water. On low speed, add the chocolate and coffee to the butter mixture and mix until blended. Don't whip! Spread immediately on the cooled cake.

Sunday, October 21, 2012

Pumpkin Whoopies with Cinnamon Maple Cream Cheese Filling

It's been a while but I couldn't keep these from my foodie friends. These are based on a recipe from Hannaford's Fresh Magazine that you pick up at the grocery store. I think it is a few years old and now I have tried all of the whoopie recipes that was in this particular issue. All of them are amazing and perfect.

The changes I made are minor. I added a little maple extract to the cake part. For the filling I didn't have 8 ounces of cream cheese - just 6 ounces. So I added 2 more ounces of butter to make up for it. I also added 2 teaspoons of maple extract and two shakes of cinnamon.

Perfection.


Pumpkin Whoopie Pies with Cinnamon Maple Cream Cheese Filling
Source: Adapted from Hannaford Fresh Magazine
Yield: 2 dozen small


11/2 cup Light brown sugar
3/4 cup Canola oil
2 1/2 teaspoon vanilla extract, divided
2 each Egg
15 oz Canned pumpkin puree (not pie filling)
3 cup All purpose flour
1 teaspoon Baking Powder
1 teaspoon Baking Soda
1/2 teaspoon Salt
3/4 teaspoon Cinnamon, ground
1/4 teaspoon Cloves, ground
1/4 teaspoon Ginger, ground
1/4 teaspoon Nutmeg, ground
1 teaspoon maple extract 

8 oz Cream cheese
1/4 cup Unsalted butter, room temperature
41/2 cup Confectioners` sugar
1 teaspoon vanilla
2 teaspoons maple extract

1. Preheat oven to 350 degrees F. Coat two baking sheets with cooking spray or line with parchment paper and set aside.
2. In a large mixing bowl, use an electric mixer on medium speed to mix brown sugar, oil, and 1 1/2 tsp. vanilla until well blended, about 3 minutes. Add eggs, one at a time, mixing until smooth after each egg. Add pumpkin and mix until incorporated.
3. In a separate bowl, stir together flour, baking powder, baking soda, salt, cinnamon, cloves, ginger, and nutmeg. Add half the flour mixture to the pumpkin mixture and mix on medium speed until smooth. Scrape down sides with a rubber spatula, and remaining flour mixture, and mix well.
4. Drop 2-Tbsp. portions of batter onto prepared baking sheets, leaving 2 inches between each portion to allow for spreading. Bake for 11 to 13 minutes, until puffed and set but still soft when touched lightly with fingertips. Let cakes cool for 3 minutes on baking sheets before transferring them to wire racks to finish cooling, about 15 to 20 minutes. Repeat with remaining batter.
5. Prepare filling while cakes are baking and cooling. In a large mixing bowl, use an electric mixer on medium speed to mix cream cheese and butter until creamy. Add 1 tsp. vanilla and half the confectioners' sugar; mix on low at first to combine, then on high until smooth. Add remaining confectioners' sugar and mix until smooth, about 3 to 4 minutes.
6. Assemble whoopie pies. Spoon filling onto the flat sides of half the cakes, dividing it evenly. Top with remaining cakes, flat side against the filling, rounded side up. Serve immediately, or wrap each whoopie pie individually in plastic wrap and store at room temperature for up to two days, or in freezer for up to two months.

Wednesday, April 11, 2012

Banana Cake with Nutella Frosting

What is it about bananas and nutella that makes my mouth and my belly so happy? The textures combined together? The flavors? I don't know. It's just amazing.

I made this cake on a snow day last month. It was an awesome day as I got to stay home with Abe all day which doesn't happen during the week. 

It was really hard to let the cake cool so I could frost it.


The cake part is really awesome. Moist and banana-y. The real shiner is the frosting, of course. I'm fairly sure I lapped the bowl.


I don't give Abe sweets very often. But it was a very special day so we splurged.


He was a very happy little boy.


It may look like he is blowing a kiss but he is shoving the last piece of cake in his mouth.


And he couldn't believe it was all gone.


You must make this cake.


Banana Cake with Nutella Frosting

Source: The Ginger Snap Girl

For the cake:

2 1/2 cups all purpose flour
1 teaspoon baking soda
1 1/2 teaspoons baking powder
1 teaspoon salt
1 1/4 sticks (10 tablespoons) unsalted butter, room temperature
1 1/2 cups superfine sugar
1 1/2 cups mashed ripe banana (about 3 large bananas)
2 large eggs
1/2 cup buttermilk
1 1/2 teaspoon vanilla extract

Preheat oven to 350 degrees F.  Line 9 x 13 cake pan with parchment paper.  Or alternatively you can butter and flour the pan, knocking off excess flour. 

In a medium bowl, whisk together flour, baking soda, baking powder and salt and set aside.  Cream butter and sugar in a stand mixer on medium speed for about 2 minutes until light and fluffy.  Add eggs, one at a time and beat on low until just combined.  Add in vanilla and mashed bananas and mix until just combined.  With mixer on low add 1/3 of the flour mixture and beat until just combined.  Add half the buttermilk.  Alternate flour and buttermilk, starting and ending with buttermilk.  Do not over mix.  Pour batter into prepared pan and bake on center rack for 35 minutes or until a toothpick inserted in the cake comes out clean.  Cool for 10 minutes in the pan and then turn cake out onto a cooling rack and remove parchment.  Allow cake to cool completely before frosting.

For the frosting:

3/4 stick (6 tablespoons) unsalted butter, room temperature
3/4 cup Nutella
3 cups confectioners (powdered) sugar, sifted
2-4 tablespoons heavy cream (or condensed milk)

In a stand mixer beat butter and Nutella on medium, about 1 minute until fully combined.  Add in confectioners sugar 1 cup at a time.  Mixture will appear crumbly.  Add in 2 tablespoons of cream and continue beating on medium-high speed for about 3 minutes.  Add additional tablespoons of cream until the frosting reaches a soft, spreadable consistency.  I used 4 tablespoons in total.  Generously spread frosting over cooled cake.  For a smooth finish, run your knife or offset spatula under hot water and gently smooth the surface, rinsing off it off after each swipe.


Thursday, November 3, 2011

Peanut Butter Whoopie Pies

A couple years ago Hannford put out a bunch of whoopie pie recipes in their Fresh magazine. Those are the best recipes I have found. I love all of them and my favorite of them might be the reverse whoopie pie. I dunno, this one is pretty close to number one too.
I thought it was really weird that there is cream cheese in the peanut butter filling. Belive me people, it works. It is amazing. So creamy. Wonderful. GIVE ME SOME!


Peanut Butter Whoopie Pies
Source: Fresh Magazine
Yield: 15 or so


7/8 cup unsalted butter, room temperature (I took this directly from their site, I think it is 2 sticks...I'll check later)
1 cup Sugar
2 each Egg
2 teaspoon Vanilla extract
3 cup All purpose flour
2/3 cup Unsweetened cocoa powder
2 teaspoon Baking Soda
1/2 teaspoon Salt
11/2 cup Cultured low fat buttermilk
6 oz Cream cheese
1/2 cup Creamy peanut butter
41/2 cup Confectioners or powdered sugar, sifted
2 tablespoon Milk

Preheat oven to 350 degrees F. Coat two baking sheets with cooking spray or line with parchment paper and set aside.

In a large mixing bowl, use an electric mixer on medium speed to mix butter and brown sugar until well blended, about 3 minutes. Add eggs, one at a time, mixing until smooth after each egg. Mix in vanilla extract.

In a separate bowl, stir together flour, cocoa powder, baking soda and salt. Add half the flour mixture to mixing bowl and mix on medium speed until combined. Add half the buttermilk and mix again on medium until smooth. Repeat with remaining flour and buttermilk, and mix until smooth. Batter will be thick and slightly springy.

Drop 2-Tbsp. portions of batter onto prepared baking sheets, leaving 2 inches between each portion to allow for spreading. Bake 11 to 13 minutes, until puffed and set but still soft when touched lightly with fingertips. Let cakes cook for 3 minutes on baking sheets before transferring them to wire racks to finish cooling, about 15 to 20 minutes. Repeat with remaining batter.

Prepare filling while cakes are baking and cooling. In a large mixing bowl, use an electric mixer on medium speed to mix crea, cheese, peanut butter, vanilla and salt until creamy. Add half the confectioners' sugar and mix on low first to combine, then on high until smooth. Add remaining confectioners' sugar and milk and blend on low, then on medium until light and fluffy, about 3 to 4 minutes.

Assemble whoopie pies. Spoon filling onto the flat sides of half the cakes, dividing it evenly. Top with remaining cakes, flat side against the filling, rounded side up. Serve immediately, or wrap and store at room temperature for up to two days, or in freezer for up to two months.

Thursday, June 30, 2011

31st Birthday Cake

Some of you may remember from previous posts in previous years that I like to make a special cake for my own birthday.
29th Birthday Cake.
30th Birthday Cake.
I've always picked something out of the ordinary and maybe a bit of a challenge. This year finding time to make myself a cake was the challenge. The weekend after my birthday Seth took Abe for a few hours so I could make a cake.

I had actually picked this cake out when I was pregnant. I saw it on Food Gawker and knew it was what I wanted for my birthday.

And it was worth the wait. It wasn't hard to make at all. I brought some to share with the teachers at daycare and they raved about it. I love to share the love. And my love...I mean baked goods.

Lemon-Blueberry Layer Cake
Source: Adapted from sweetapolita
Yield: 8-10 servings

2 cups plus 6 tablespoons all-purpose flour
2 teaspoons baking powder
1 teaspoon salt
3 cups fresh blueberries
1 cup buttermilk
2 teaspoons vanilla extract
1 teaspoon lemon zest
1 cup (2 sticks) unsalted butter, softened about 20 minutes out of refrigerator
1 1/2 cups white sugar
4 large eggs

Preheat oven to 350°F. Prepare two 8″ round cake pans with parchment paper, butter and flour. Sift dry ingredients into medium bowl. Transfer 1 tablespoon flour mixture to larger bowl. Add fresh blueberries and toss to coat them with flour. Set remaining flour mixture and blueberries aside.

Stir buttermilk, vanilla extract, and lemon zest in small bowl. In the bowl of a stand mixer, cream butter and sugar, until pale yellow and very fluffy, about 5 minutes. Beat in eggs one at a time, until well combined. Mix in flour mixture alternately with milk mixture, starting and ending with flour mixture. Stir until just combined. Gently fold in blueberries. Divide batter equally among 8″ round pans.

Bake cakes until toothpick inserted into center comes out clean, about 25 minutes. Cool cakes in pans on racks for about 10 minutes, then invert onto racks until completely cool.

Zesty Lemon Frosting

1 cup soft unsalted butter
2 teaspoons lemon zest
6 cups icing sugar
60 ml fresh lemon juice
6 tablespoons whipping cream
2 tablespoons water


Cream butter and lemon zest in bowl of electric mixer fitted with paddle attachment, about 3 minutes. Slowly add icing sugar, mixing on low speed for about 2 minutes. Add remaining ingredients and beat on med-high for 3-4 minutes until very fluffy. If using color gel, add a drop or two (really, no more than that, because too much sunshine really can be a bad thing!), then beat until blended. Yields enough to frost outside of three layer 8″ round cake.

Filling: I didn't have the time or energy to make lemon curd so I used prepared.

Assembly

Put one cake berry side down on pedestal. Create a dam with the frosting by piping around the perimeter of the top layer. This will prevent the curd from seeping out when you put the other layer on. Spread curd in middle of the dam. Top with other cake, berry side up. Crumb coat and then frost the cake!

Due to the lemon curd filling, keep cake covered and refrigerated (for up to 2 days) but serve room temperature.

Monday, May 23, 2011

Ruby Red Grapefruit Cake

This had been on my list of things to make for quite some time. In an effort to balance the budget, Maine has had furlough days for the past two years. After becoming a mother I have dedicated furlough days to baking something that is a bit more time consuming than just chocolate chip cookies. We only have one more furlough day left. I will be happy to see the money back in my pay check...but sad to have a day off when daycare is open. (a little selfish but Mommy needs mommy-time!)

I thought this cake was fantastic. So so moist with the syrup made from the grapefruit (I may have indulged a bit in the syrup itself...or just used some in a glass of water to make grapefruitade of sorts). Be patient in letting the syrup soak into the cake...it takes time.


Ruby Red Grapefruit CakeSource: Ad Hoc at Home by Thomas Keller
Yield: One 9x4 loaf

Cake:
2 cups all-purpose flour
1 3/4 teaspoons baking powder
1 teaspoon kosher salt
1 2/3 cups granulated sugar
2 large eggs
1 cup whole milk
3/4 cup canola oil
1 tablespoon grated ruby grapefruit zest
1 teaspoon vanilla paste or pure vanilla extract
Grapefruit Syrup:
1 cup strained fresh ruby grapefruit juice
2/3 cup granulated sugar

Grapefruit Icing:
3/4 cup powdered sugar
1 tablespoon plus 1 teaspoon fresh ruby grapefruit juice

Preheat your oven to 350°F. Prep your pan by coating with a little non-stick spray or lightly oil.

Sift together the flour and baking soda and then whisk in the kosher salt. Set the mixture aside.

In the bowl of your stand mixer, using the whisk attachment, combine the eggs and sugar on medium speed for three minutes. The mixture should thicken, increase in volume and the whisk will leave a trail in the batter. Once everything looks right, beat in the milk, oil, then the zest and vanilla.

Reduce your mixer's speed to low and then beat in the flour, scraping the sides of the bowl as needed, until incorporated.

Pour the batter into your pan. Bake for an hour (rotating once).
While waiting for the cakes to bake, you can prep the grapefruit syrup.

Combine the grapefruit juice and sugar in a medium sauce pan over medium-high heat. Stir constantly until the sugar has dissolved. Bring to a boil, reduce heat to a simmer (it can boil over if left over high heat) and cook for 1 minute.

Once you pull your cake from the oven, poke holes into the cake with a wooden skewer. Brush your syrup over the cake, allowing it to absorb and then repeating until you've used up all the syrup. Allow the cake to cool in the pan completely before attempting to unmold.

To unmold, lightly coat a piece of waxed or parchment paper with a little oil or nonstick spray. Cover the cake with the paper and then invert. Turn the cake right-side-up onto a serving dish.

Whisk together the powdered sugar and grapefruit juice to make a glaze. Drizzle the glaze diagonally across the cake, allowing it to run down the sides. Slice and serve.

Keep the cake loosely covered at room temperature for up to two days.

Saturday, May 21, 2011

Vanilla Cupcakes with Chocolatey Ganachey Frosting

I'm sorry Mr. Spellcheck...is chocolately not a word?? No? How about ganachey?? No?

Well they should be.

At first I was super stoked about this frosting. When warm/room temp it is amazing. As it cools it does get pretty hard. I am in love with the cupcake though. Buttery and perfect.


Vanilla Cupcakes with Chocolate Frosting
Source: Annie's Eats
Yield: 24 cupcakes

2 sticks (1 cup) unsalted butter, at room temperature, plus more for greasing pans
1½ cups all-purpose flour, plus more for dusting pans
1½ cups cake flour
1 tbsp. baking powder
½ tsp. salt
1¾ cups sugar
4 large eggs
2 tsp. vanilla extract
1¼ cups milk

For the frosting:
1 lb. semisweet chocolate, finely chopped
6 tbsp. Dutch-process cocoa powder
6 tbsp. boiling water
3 sticks (1½ cups) unsalted butter, at room temperature
½ cup confectioners’ sugar, sifted
Pinch of salt


To make the cakes, preheat the oven to 350˚ F. Line the bottoms of two 9-inch round cake pans with parchment paper. Butter and flour the edges of the pans, tapping out the excess; set aside. In a medium bowl, combine the all-purpose flour, cake flour, baking powder, and salt; whisk together to blend well and set aside.

In the bowl of an electric mixer, combine the butter and sugar. Beat on medium-high speed until light and fluffy, about 4 minutes, scraping down the bowl as needed. Mix in the eggs one at a time, beating well after each addition. Blend in the vanilla. With the mixer on low speed, add in the dry ingredients in three additions, alternating with the milk. Beat each addition just until incorporated.

Divide the batter between the prepared baking pans. Bake, rotating the pans halfway through baking, until the cakes are golden and a toothpick inserted in the center comes out clean, 30-35 minutes. Transfer the pans to a wire rack and let cool 20 minutes. Run a knife around the edge of the pans to help remove the cakes. Invert the cakes onto the rack and peel off the parchment. Let the cakes cool completely before frosting. Level the cakes if necessary.

To make the frosting, place the chocolate in a heatproof bowl set over a pan of simmering water. Heat, stirring occasionally, until the chocolate has melted. Remove from the heat and let cool to room temperature, about 25-30 minutes. Meanwhile, combine the cocoa powder and boiling water in a small bowl; stir until the cocoa is dissolved.

In the bowl of an electric mixer, beat the butter, confectioners’ sugar and salt on medium-high speed until light and fluffy, 3-4 minutes. Add the melted chocolate; beat on low speed until combined, 1-2 minutes. Beat in the cocoa mixture until well blended. (Note: My frosting was still a bit runny for decorating at this point. I let it cool longer before frosting the cake so it could firm up slightly.)

To assemble the cake, place one of the cake layers on a serving platter. Top with 1 cup of the chocolate frosting and smooth over the top of the cake. Top with the remaining cake layer. Frost the top and sides of the cake with the remaining frosting as desired. Refrigerate, covered, for up to 3 days. Let come to room temperature at least 30 minutes before serving.

Thursday, May 19, 2011

Amazing Chocolate Bundt Cake

I made an absolute mess with this cake. I whipped it together while the baby was napping. I tried letting it cool as much as I could before frosting it...but apparently I didn't let it cool enough because when I checked on it in the morning (hello breakfast) there was a pool of frosting in the middle.

I mean, not that there is anything wrong with a one inch pool of fantastic chocolate frosting.

This cake is amazing. It is moist and chocolatey. The frosting is wonderful. Just perfection.

Make this.

Do it.

But make sure to let it cool all the way before frosting it...otherwise you have a mess.


Chocolate Frosted Chocolate Bundt Cake
Source: Joy the Baker
Yield: 8-10 servings

For the Cake:
1 1/4 cups plus 1 Tablespoon brewed coffee
3/4 cup Dutch process cocoa powder
2 1/4 cups sugar
1 1/4 teaspoons kosher salt
2 1/2 teaspoons baking soda
2 whole eggs
1 egg yolk
1 1/4 cups plus 1 Tablespoon buttermilk
1 cup plus 2 Tablespoon canola oil
1 1/2 teaspoons vanilla extract
2 1/2 cups, plus 2 Tablespoons all-purpose flour, sifted

For the Glaze:
6 ounces unsweetened chocolate
3/4 cup unsalted butter
3 cups powdered sugar
1/2 cup sour cream, at room temperature
1/4 cup brewed coffee, cooled

Place an oven rack in the center of the oven and preheat to 350 degrees F.

Grease and flour a 10-inch Bundt pan and set aside.
To make the cake batter: Put brewed coffee and cocoa powder in a small saucepan and bring to a boil, whisking frequently. Remove from the heat and let come to room temperature.

In the bowl of a stand mixer fit with a whisk attachment, mix together sugar, salt, baking soda, eggs and egg yolk on low speed for about 1 minute. Add the buttermilk, oil and vanilla extract and mix on low again for another minute.

Add the flour and mix on medium speed for 2 minutes. Add the cooled cocoa mixture and mix on medium speed for 3 minutes. The batter will be very loose. Pour into the prepared cake pan and bake for 1 hour, or until a cake tester inserted in the cake comes out clean.

Let the cake cool completely in the pan and then invert onto a cooling rack.

To make the icing: Chop the chocolate into small pieces, put them in a heatproof bowl (or a double boiler), and set the bowl over a pot of barely simmering water. Be sure that the bottom of the bowl does not touch the boiling water. Remove the bowl from the heat when all of the chocolate bits have melted.

Melt the butter in a separate pan or in the microwave. Whisk the melted butter into the melted chocolate until thoroughly incorporated. Sift in half of the powdered sugar. Add the sour cream and whisk to combine. Sift in the remaining powdered sugar and whisk until smooth. The glaze should be thick and shiny. Lastly, add the coffee and whisk to create a glossy glaze.

Pour the glaze over the Bundt cake, covering it completely. Leave at room temperature until ready to serve.

Wednesday, April 20, 2011

Buttermilk Cocoa Cake with Cocoa Malt Buttercream

My baby has a girlfriend at school. As in...a twentysomething year old girlfriend. Often times I will go to pick him up at school and she will tell me that he was attached to her all day and would cry unless she was within his eyesite. They have such a special friendship!

She had a birthday recently and I thought that I MUST make her something to show my appreciation for her taking such good care of my boy. And you know me...I always say thank you with sweet treats.

I've been wanting to make this cake from Dorie Greenspan for quite some time. This was the perfect opportunity. Abe even helped me make it! (well he kept me company while I made it)
I thought this was a pretty good cake. It wasn't super moist but wasn't dry either. The frosting is what had me intrigued. I really liked it but some might want something more smooth.


Buttermilk Cocoa Cake with Cocoa Malt Buttercream
Source: From My Home to Yours by Dorie Greenspan
Yield: One cake. Duh.

For the Cake:

2 cups all-purpose flour
1/2 cup unsweetened cocoa powder
1/2 teaspoon baking powder
1/2 teaspoon baking soda
1/2 teaspoon salt
2 sticks (8 ounces) unsalted butter, at room temperature
1 1/2 cups sugar
2 large eggs
2 large egg yolks
1 teaspoon pure vanilla extract
1 cup buttermilk
4 ounces bittersweet chocolate, melted and cooled (optional)

For the Chocolate-Malt Buttercream

6 ounces bittersweet chocolate, coarsely chopped
1/3 cup (packed) light brown sugar
1/4 cup malted milk powder
1 tablespoon unsweetened cocoa powder
1/4 cup boiling water
2 sticks (8 ounces) unsalted, butter, at room temperature
Pinch of salt
3/4 teaspoon pure vanilla extract
2 1/4 cups confectioners sugar, sifted
Getting Ready to Bake: Center a rack in the oven and preheat the oven to 350 degrees F. Butter two 9-x-2-inch round cake pans, dust the insides with flour, tap out the excess and line the bottoms with rounds of parchment or wax paper. Put the pans on a baking sheet.

To Make the Cake: Whisk together the flour, cocoa, baking powder, baking soda and salt.

Working with a stand mixer, preferably fitted with a paddle attachment, or with a hand mixer in a large bowl, beat the butter on medium speed until soft and creamy. Add the sugar and beat for about 2 minutes, until it is thoroughly blended into the butter. Add the eggs one at a time, then the yolks one by one, beating for 1 minute after each addition and scraping down the sides and bottom of the bowl as needed. Beat in the vanilla. Reduce the mixer speed to low and add the dry ingredients alternately with the buttermilk; add the dry ingredients in 3 portions and the buttermilk in 2 (begin and end with the dry ingredients); mix only until each new batch is blended into the batter. Scrape down the bowl and, if you want, add the melted chocolate, folding it in with a rubber spatula. Divide the batter between the cake pans.

Bake for 26 to 30 minutes, or until the cakes feel springy to the touch and start to pull away from the sides of the pans. Transfer the cakes to racks and cool for about 5 minutes, then run a knife around the sides of the cakes, unmold them and peel off the paper liners. Invert and cool to room temperature right side up. (Once the layers are cooled, they can be wrapped airtight and left at room temperature overnight or kept frozen for up to 2 months.)

To Make the Buttercream: Melt the chocolate with half the brown sugar in a heatproof bowl set over a saucepan of simmering water. Remove from the heat.

Whisk the malt powder and cocoa together in a small bowl, pour over 3 tablespoons of the boiling water and whisk until smooth. Whisking the melted chocolate gently, gradually pour in the hot malt-cocoa mixture and stir to blend—it should be dark, smooth and glossy; set aside.

Working with the stand mixer, preferably fitted with the paddle attachment, or with a hand mixer in a large bowl, beat the butter on medium speed until soft and fluffy, about 2 minutes. Add the remaining brown sugar and beat for 2 to 3 minutes more, until well blended. Beat in the salt and vanilla extract, then reduce the mixer speed to low. Scrape in the chocolate mixture and mix until smooth. Still working on low speed, gradually add the confectioners sugar. When all the sugar is in, increase the mixer speed to medium and beat for a couple of minutes. Lower the speed and add the remaining tablespoon of boiling water, then increase the speed and give the frosting another quick spin. It will be light and should be thick enough to use immediately. If it doesn't hold its shape, beat it just a bit more.

To Assemble the Cake: Place one layer top side up on a cardboard round or a cake plate protected by strips of wax or parchment paper. Frost the top of the layer, and cover with the second layer, top side down. Frost the sides and top of the cake, either smoothing the buttercream for a sleek look or using a spatula, knife or spoon to swirl it for a more exuberant look.

Refrigerate the cake for at least 1 hour (or for up to 1 day, if that's more convenient) to set the frosting, then bring it to room temperature before serving.

Thursday, February 24, 2011

Valentine's Cupcakes

I made these cupcakes for Valentine's Day. I shared them with my baby's teachers and my coworkers. When I brought these to work, I dropped them off in the kitchen...walked back to my desk...attempted to open an email to announce that they were there...by the time I got the email up my cubie neighbor told me there was one left! They disappeared in about 5 minutes!

I love the cake part of these but wasn't fully satisfied with the buttercream. It was super sweet and too almondy for me. I'll try something different next time!


Vanilla Cupcakes with Buttercream Icing
Source: Annie's Eats and Stetted
Yield: 24 cupcakes

2 sticks (1 cup) unsalted butter, at room temperature, plus more for greasing pans
1½ cups all-purpose flour, plus more for dusting pans
1½ cups cake flour
1 tbsp. baking powder
½ tsp. salt
1¾ cups sugar
4 large eggs
2 tsp. vanilla extract
1¼ cups milk

To make the cupcakes, preheat the oven to 350F. Line or grease cupcakes pans. In a medium bowl, combine the all-purpose flour, cake flour, baking powder, and salt; whisk together to blend well and set aside.

In the bowl of an electric mixer, combine the butter and sugar. Beat on medium-high speed until light and fluffy, about 4 minutes, scraping down the bowl as needed. Mix in the eggs one at a time, beating well after each addition. Blend in the vanilla. With the mixer on low speed, add in the dry ingredients in three additions, alternating with the milk. Beat each addition just until incorporated.

Divide the batter between the prepared baking pans. Bake, rotating the pans halfway through baking, until the cupcakes are golden and a toothpick inserted in the center comes out clean, 20-25 minutes. Transfer the pans to a wire rack and let cool 20 minutes. Let the cakes cool completely before frosting.

Buttercream
2 sticks butter, softened
6 cups powdered sugar
4 tablespoons milk
1 tablespoon vanilla extract
1 teaspoon almond extract

Beat butter until creamy. Add the sugar, milk and extracts and beat, slowly at first, and then until nice and fluffy..

Thursday, February 17, 2011

Emergency Blender Cupcakes

Need chocolate cupcakes FAST? Well who doesn't really. I mean...when you need a cupcake...you NEED a cupcake! Wait, is that only me?

These are fabulous. The frosting is quite fudgey but quite delicious.

Emergency Blender Cupcakes
Source: Weekend Baker
Yield: 1 dozen cupcakes

1 cup flour
1/2 unsweetened cocoa powder
1 cup sugar
1/2 tsp. baking soda
1/4 tsp. salt
3/4 cup hot water
1/2 cup canola oil
1 large egg
1 1/2 tsp. vanilla extract

Heat oven to 375°F. Line 12 regular-sized muffin cups with paper or foil liners.

Combine flour, cocoa, sugar, baking soda, and salt in a blender. Cover with the lid and blend on medium speed until blended. Pour in the water, oil, egg, and vanilla. Cover with the lid and blend on medium-high speed until smooth and well blended, stopping to scrape down the sides once or twice. Pour into lined muffin cups, dividing evenly. Bake until a toothpick inserted in the center of one cupcake comes out clean, 17–19 minutes. Transfer to rack to cool for about 10 minutes, and then carefully remove the cupcakes from the pan and set them on the rack to cool completely before frosting.

For the frosting:
8 ounces bittersweet chocolate, finely chopped
8 tablespoons unsalted butter, cut into pieces
1 cup sweetened condensed milk (not evaporated)
1/4 cup light corn syrup
1 teaspoon vanilla extract
1 Pinch salt

Melt chocolate and butter in the microwave. Add condensed milk, corn syrup, vanilla and salt. Whisk until well blended. Set aside at room temperature, whisking frequently. It will thicken as it cools. When completely cool, cover with plastic wrap until ready to frost.

Tuesday, February 8, 2011

New York Style Coffee Cake

It is the small things in life that please a new mother. Small things like coffee cake and a cup of coffee on a snowy day.

And I mean quality coffee cake. Big chunks of crumb that melt on your tongue. And cake that is so moist and vanillay (I think I just made up a word!).

One can not resist this coffee cake...not even my health nut of a husband.

New York Style Coffee Cake
Source: Baked Explorations
Yield: 16 servings

For the crumb topping:

1 cup firmly packed brown sugar
1/2 cup granulated sugar
1/2 teaspoon salt
1 1/2 tablespoons cinnamon
1 cup (2 sticks) melted butter
2 1/2 cups all-purpose flour

For the cake:

2 1/2 cups all-purpose flour
3/4 teaspoon baking powder
1 teaspoon baking soda
1/2 teaspoon salt
12 tablespoons (1 1/2 sticks) butter
1 1/2 cups granulated sugar
2 large eggs
1 1/4 cups sour cream
1 teaspoon vanilla extract

Preheat the oven to 350 degrees. Butter the sides and bottom of a glass 9×13 pan. You can use a metal pan, but the edges may get a bit crispy.

To make the crumb topping, mix both sugars, salt, and cinnamon in a medium bowl. Add the melted butter and whisk until combined. Fold in the flour until it is absorbed. Spread out a large sheet of parchment paper on the counter and spread this mixture out on the parchment paper to dry while you make the cake mixture.

To make the cake, sift the flour, baking powder, baking soda, and slat together in a medium bowl and set aside.

Cream the butter until it is smooth and ribbon like in the bowl of a stand mixer fitted with the paddle. Scrape down the bowl and add the sugar. Beat until fluffy. Add the eggs, one at a time, and beat until incorporated. Scrape the bowl and mix again for 30 seconds. Add the sour cream and vanilla and beat just until incorporated. Add the dry ingredients in three parts, scraping down the bowl before each addition, beating only until it is just incorporated.

To assemble the cake, pour the batter in the prepared pan.Use your hands to scoop up a handful of the topping and make a fist. The topping should hold together. Break off in chunks and drop them over the cake. Repeat to use all the topping. Remember, the topping layer will look very thick.

Bake the cake for 45 to 55 minutes, or until a toothpick inserted in the middle comes out clean. Rotate the pan two times during the baking process. Cool the entire pan on a wire rack for 30 minutes before serving.

The cake will last for 3 days, tightly covered, at room temperature.

Tuesday, October 19, 2010

Chocolate Pumpkin Whoopie Pies

Last weekend I had two girlfriends over for lunch. I made a fabulous spicy sweet potato soup and served it with a sesame bread. Then for dessert I was so excited to make pumpkin whoopie pies. I was going to try a new recipe that I found in Bon Appetit last year. What a flop. The cake part of the whoopie was flat as a pancake and the filling was boring. I was so disappointment. But I'm glad I tried it out so now I won't wonder about that recipe.

Anyway, we are here to talk about these chocolate whoopie pies. These were wonderful. The cake part is perfection. The middle was pretty good. I did add more powdered sugar to sweeten it and thicken the filling. Other than that...perfect.


I brought these into the office and they were gone in a flash.


Chocolate Pumpkin Whoopie Pies
Source: Burn Me Not
Yield: 12 decent sized whoopie pies

For the cookies
1 3/4 cups all-purpose flour
3/4 cup unsweetened cocoa powder
1 1/2 tsp baking soda
1/2 tsp salt
1 tbsp unsalted butter, softened
1/4 cup vegetable shortening
1/2 cup granulated sugar
1/2 cup packed dark-brown sugar
1 large egg
1 cup whole milk
1 tsp pure vanilla extract

For the filling
4 oz cream cheese, at room temperature
1/2 cup (1 stick) unsalted butter, at room temperature
1/2 cup confectioners sugar (I added another 1/2 cup)
1/4 cup canned solid pumpkin
Pinch of cinnamon
Pinch of nutmeg

Preheat oven to 375°. Line baking sheet with non-stick baking mat or parchment paper; set aside.

In a medium bowl, whisk together flour, cocoa powder, baking soda, and salt; set aside.

In the bowl of an electric mixer, combine butter, shortening, and both sugars. Using the paddle attachment, mix on high speed until smooth, about 3 minutes. Add egg; mix until pale and fluffy, about 2 minutes. Mix in half the flour mixture, then milk and vanilla, and finish with the remaining flour mixture.

Drop about a tablespoon of dough onto prepared baking sheet, spacing 2 inches apart. Bake 12-14 minutes or until cookies spring back when lightly touched. Place baking sheet on wire rack and let cool 5-10 minutes. Remove cookies from baking sheet and transfer to wire rack to cool completely.

In a medium bowl, mix together cream cheese, butter, and confectioners sugar on medium speed until smooth, about 3 minutes. Add pumpkin, cinnamon, and nutmeg. Mix until smooth, scraping down bowl as necessary.

Pipe or spoon filling on the flat sides of half the cookies then sandwich with remaining cookies.

Thursday, September 30, 2010

Chocolate Zucchini Cake

Really I should have posted this earlier when zucchini was in abundance. I feel like the crop is dwindling at this point.

If you do have a massive zucchini kicking around and you aren't sure what to do with it, make this. Make this for your friends. Make this for your coworkers. People love this cake.

I brought this over to another couple's house for a dinner. I should have just said it was a chocolate bundt cake because the husband wasn't so sure about eating a cake with zucchini in it. He ate it. He enjoyed it. But I think he was a little freaked that it had a vegetable in it. That is what makes it healthy! DUH!


Chocolate Zucchini Cake
Source: The Food Librarian
Yield: 12 servings

2 1/2 cups regular all-purpose flour, unsifted
1/2 cup cocoa
2 1/2 teaspoons baking powder
1 1/2 teaspoons baking soda
1 teaspoon salt
1 teaspoon cinnamon
3/4 cup soft butter
2 cups sugar
3 eggs
2 teaspoons vanilla
2 teaspoons grated orange peel
2 cups coarsely shredded zucchini
1/2 cup milk
1 cup chopped walnuts or pecans
Glaze (directions follow)

Preheat the oven to 350°F.

Combine the flour, cocoa, baking powder, soda, salt, and cinnamon; set aside.

With a mixer, beat together the butter and the sugar until they are smoothly blended. Add the eggs to the butter and sugar mixture one at a time, beating well after each addition. With a spoon, stir in the vanilla, orange peel, and zucchini.

Alternately stir the dry ingredients and the milk into the zucchini mixture, including the nuts with the last addition.

Pour the batter into a greased and flour-dusted 10-inch tube pan or bundt pan. Bake in the oven for about 50 minutes (test at 45 minutes!) or until a wooden pick inserted in the center comes out clean. Cool in pan 15 minutes; turn out on wire rack to cool thoroughly.

Drizzle glaze over cake.

Glaze: Mix together 2 cups powdered sugar, 3 Tablespoons milk, and 1 teaspoon vanilla. Beat until smooth.

Cut in thin slices to serve.

Thursday, September 23, 2010

Zucchini Whoopie Pies

I did it! I found a fabulous zucchini whoopie pie recipe. I tried to make up my own recipe by altering a muffin recipe. Nope. That didn't work very well. Then I found this old recipe in my binder, and by old I mean over 10 years old. I didn't realize my recipe binders were that old!!

Seth and I were invited to his coworkers party a month or so ago. I offered to bring a treat and one of the girls wanted something with pumpkin. I said it wasn't quite pumpkin season so I decided on zucchini. Now, Seth is a retail manager so he tends to work with younger people. We went to the party and boy did I feel old. Seth was the only male and the girls were around 20-24. There was a lot of giggling and lot of shots. I remember those days.

God I'm old.

Anyway. These whoopie pies were a hit. I filled them with my own filling but if you wanted to do a cream cheese filling you could do that too. Yum!


Zucchini Whoopie Pies
Source: I dunno...the binder?
Yield: A dozen or so


1 cup grated zucchini
1 cup white sugar
1 t baking soda
1 t baking powder
1/2 cup shortening
1 egg
2 cups plus 2 T flour
1 t vanilla
1 t cinnamon
1/2 t cloves
1/2 t salt
1/2 cup milk


Preheat oven to 375.


Mix zucchini, sugar, shortening and egg. Sift all the dry ingredients and add to the zucchini mixture alternating with the milk. Mix until smooth. Bake 8-10 minutes. Fill with your favorite whoopie pie filling.

Thursday, August 26, 2010

Strawberry Shortcake

This is a dessert that my husband will eat!! My father used to make this hot milk cake when we were kids and it is the perfect base for a shortcake. It is low fat, sweet, and luscious. Oh, and really easy to whip up. I top it with strawberries and fat free cool whip for Seth. I like mine with fresh whipped cream of course!

Top yours with blueberries, raspberries, blackberries, or just eat it plain!

Hot Milk Cake
Source: Better Homes and Garden
Yield: about 16 servings

1 cup all-purpose flour
1 teaspoon baking powder
2 eggs
1 cup sugar
1/2 cup milk
2 tablespoons butter or margarine

Grease a 9x9x2-inch baking pan; set pan aside. Stir together flour and baking powder; set aside.

In a mixing bowl beat eggs with an electric mixer on high speed about 4 minutes or until thick. Gradually add sugar, beating on medium speed for 4 to 5 minutes or until light and fluffy. Add the dry mixture; beat on low to medium speed just until combined.

In a small saucepan heat and stir milk and butter until butter melts; add to batter, beating until combined. Pour batter into the prepared pan.

Bake in a 350 degree F oven for 20 to 25 minutes or until a wooden toothpick comes out clean. Cool cake in pan on a wire rack. Makes 9 servings.

Sunday, August 22, 2010

Lemon Pull Apart Coffee Cake

I knew when I saw this coffee cake that I had to make it. The idea of the yeasty pull apart goodness had me hooked and I'm so glad I made it.

I brought this in to share with my coworkers because if left at home I would have eaten the entire thing. Everyone really enjoyed it but my father, who is a bit old school, was confused why it was called a coffee cake. I think he was expecting something more cakey, less bread like. This is almost like a cinnamon roll made into a loaf...minus cinnamon...plus lemon.

Now, I know that the recipe look daunting. It really isn't that bad. Like any yeast bread you have to let it rise so plan ahead. I promise it is worth it!


Lemon Pull Apart Coffee Cake
Source: 17 and baking
Yield: 10ish servings

Sweet Yeast Dough
About 2 3/4 cups (12 1/4 ounces) all-purpose flour
1/4 cup (1 3/4 ounces) granulated sugar
2 1/4 teaspoons (1 envelope) instant yeast
1/2 teaspoon salt
1/3 cup (2 1/2 fluid ounces) whole milk
2 ounces unsalted butter
1/4 cup (2 fluid ounces) water
1 1/2 teaspoons pure vanilla extract
2 large eggs, at room temperature

Lemon Sugar Filling
1/2 cup (3 1/2 ounces) granulated sugar
3 tablespoons finely grated lemon zest (3 lemons)
1 tablespoon finely grated orange zest
2 ounces unsalted butter, melted

Tangy Cream Cheese Icing
3 ounces cream cheese, softened
1/3 cup (1 1/4 ounces) powdered sugar
1 tablespoon whole milk
1 tablespoon fresh lemon juice

Make the Sweet Yeast Dough
Mix two cups flour, the sugar, yeast, and salt in a medium bowl with a rubber spatula. Meanwhile, in a small saucepan or in the microwave, combine the milk and the butter and heat until the butter is melted. Remove from the heat, add the water, and let rest a minute until just warm (120 to 130°F) Stir in the vanilla extract.

Pour the milk mixture over the flour-yeast mixture and, using a rubber spatula, mix until the dry ingredients are evenly moistened. Attach the bowl to the mixer, and fit the mixer with the paddle attachment. With the mixer on low speed, add the eggs, one at a time, mixing after each addition just until incorporated. Stop the mixer, add 1/2 cup of the remaining flour, and resume mixing on low speed until the dough is smooth, 30 to 45 seconds. Add 2 more tablespoons flour and mix on medium speed until the dough is smooth, soft, and slightly sticky, about 45 seconds.

Lightly flour a work surface and knead the dough gently until smooth and no longer sticky, about one minute. Add an additional 1-2 tablespoons of flour only if the dough is too sticky to work with. Place the dough in a large bowl, cover it with plastic wrap, and let it rise in a warm place (about 70°F) for 45-60 minutes or until doubled in size. An indentation made with your finger should keep its shape.

Meanwhile, make the lemon sugar filling. Mix the sugar, lemon zest, and orange zest. It’ll draw out the citrus oils and make the sugar sandy and fragrant.

Center a rack in the oven and preheat the oven to 350°F. Grease a 9″x5″ loaf pan.

Gently deflate the dough with your hand. Flour a work surface and roll the dough into a 20″ by 12″ rectangle. [She suggests using a ruler and getting this as accurate as possible, for a prettier loaf that will fit better in the pan. I also suggest making sure both sides are floured, so that the dough will be easy to lift up later.] Use a pastry brush to spread the melted butter evenly and liberally over the dough.

Use a pizza cutter to cut the dough crosswise in five strips, each about 12″ by 4″. Sprinkle 1 1/2 tablespoons of the lemon sugar over the first buttered rectangle. Top it with a second rectangle, sprinkling that one with 1 1/2 tablespoons of lemon sugar as well. Continue to top with rectangles and sprinkle, so you have a stack of five 12″ by 4″ rectangles, all buttered and topped with lemon sugar. [She suggests carefully sprinkling the sugar and pressing it in lightly to keep it from falling off.]

Slice this new stack crosswise, through all five layers, into 6 equal rectangles (each should be 4″ by 2″.) Carefully transfer these strips of dough into the loaf pan, cut edges up, side by side. it might be a little roomy, but the bread will rise and expand after baking. Loosely cover the pan with plastic wrap and let the dough rise in a warm place (70 °F [21°C]) until puffy and almost doubled in size, 30 to 50 minutes. When you gently press the dough with your finger, the indentation should stay.

Bake the loaf until the top is golden brown, 30 to 35 minutes. (I baked mine for another 10 or so minutes. It started to brown on the top so I covered it with foil). Transfer to a wire rack and let cool in the pan for 10 to 15 minutes.

Meanwhile, make the cream cheese icing. Beat the cream cheese and powdered sugar in a medium bowl with a wooden spoon until smooth, then add the milk and lemon juice. Stir until creamy and smooth.

The recipe recommends you tilt and rotate the pan while tapping on a table to release the loaf. I just carefully ran a knife around it. Flip the loaf over onto a cooling rack, then flip onto another rack so that it’s right side up. Spread the top of the warm cake with the cream cheese icing, using a pastry brush to fill in all the cracks. [You might want to put a pan or piece of wax paper under to catch any drips.]

Eat warm or at room temperature. You can also cut the cake with a knife, but wait for it to cool if you plan to do so. The cake tastes better on the first day.