Showing posts with label Breakfast. Show all posts

Saturday, February 9, 2013

Peanut Butter and Jelly Loaf

We are in the midst of a blizzard here in Maine. Daycare was closed for a half day yesterday so Abe and I whipped this up after naptime. As you probably know and agree, snowy days are perfect for baking. I love baking with my two year old.

This loaf came out excellent. I used Trappist strawberry jam made in Massachusetts. I did end up tenting it with foil toward the end and baking it another 15 minutes, it wasn't done in the middle after 50 minutes.
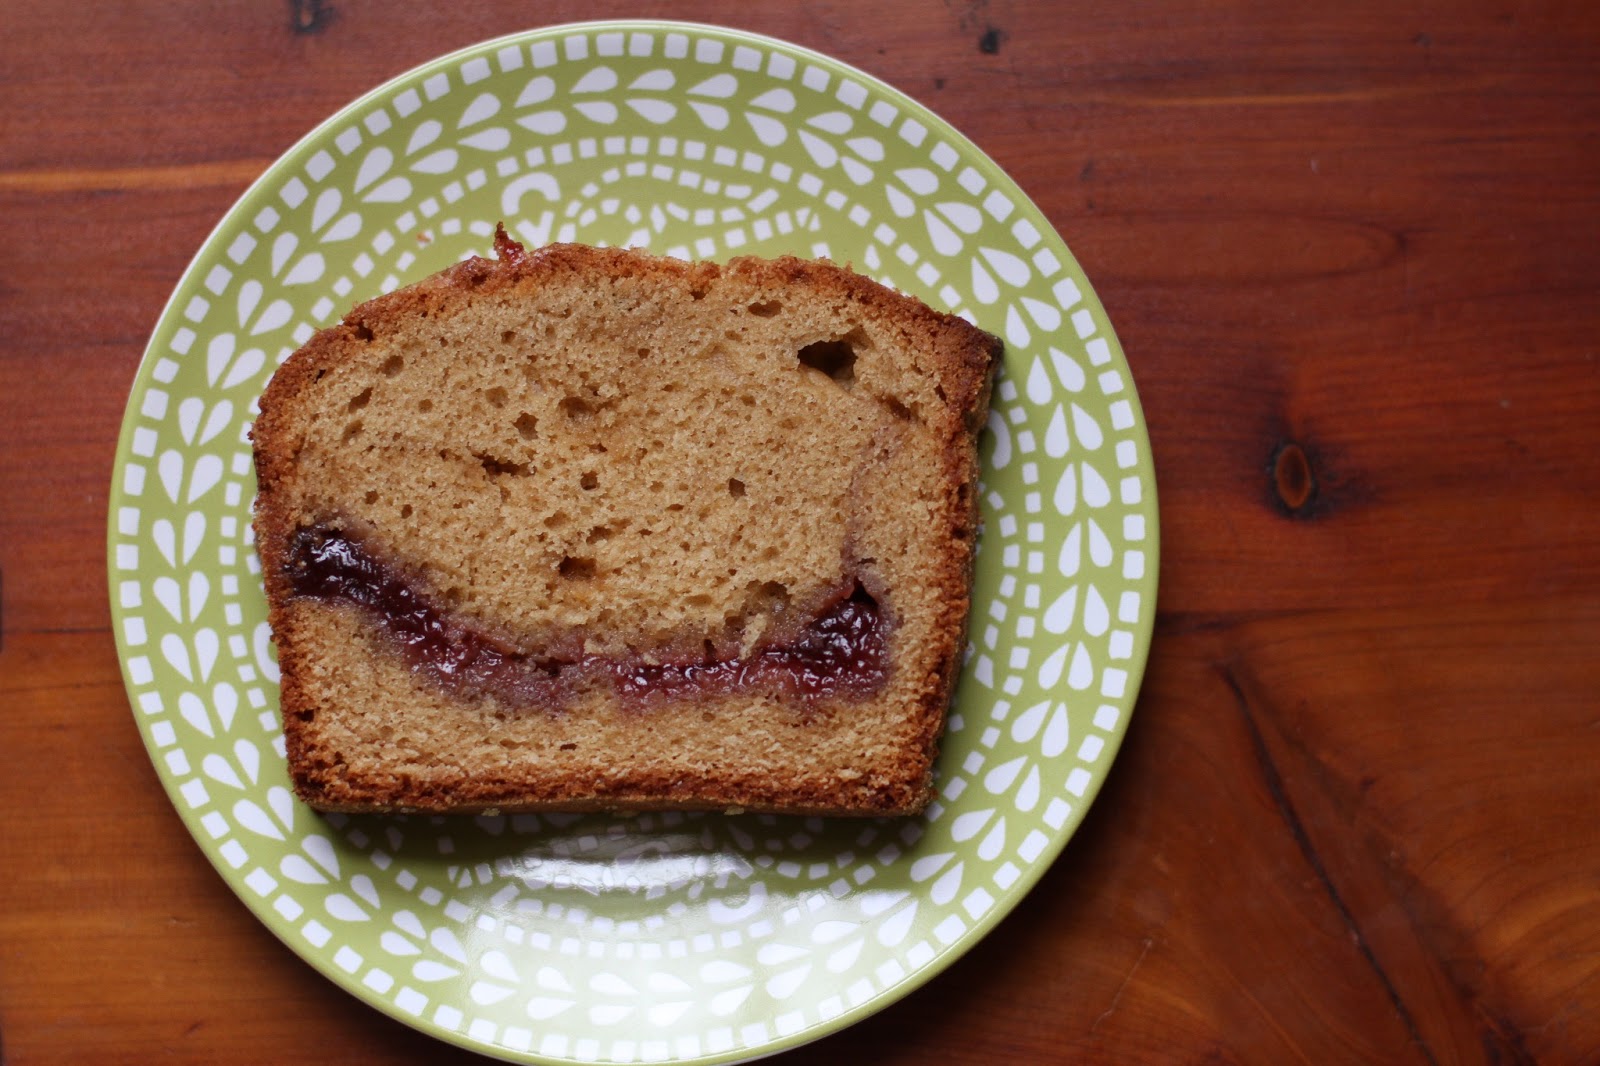

Peanut Butter and Jelly Loaf
Source: 17 and Baking


1 1/2 cups all-purpose flour
1/2 tsp baking powder
1/4 tsp baking soda
1 tsp salt
1/2 cup whole milk, room temperature
1 tsp vanilla extract
3/4 cup creamy, all natural peanut butter (with no added palm oil)
2 oz (1/2 stick) butter, room temperature
3/4 cup granulated sugar
1/2 cup packed dark brown sugar
3 eggs, room temperature
1/2 cup jam

Preheat the oven to 350 F. Butter a 9×5″ loaf pan and coat it with sugar.
Sift the flour, baking soda, baking powder, and salt into a small bowl. In another bowl, stir the jam to break it up and get it loose.
In the bowl of a stand mixer, cream the peanut butter, butter, and sugars on medium high speed for a full five minutes. The mixture won’t get light and fluffy and the sugar won’t dissolve, but the mixture will be less grainy.
Beat in the eggs one at a time, mixing well after each one and scraping down the sides of the bowl.
Beat in half the flour mixture, then the milk and vanilla extract, then the rest of the flour, scraping the sides of the bowl. The batter will be thin. Pour half the batter into the loaf pan and dollop with jam. Pour the rest of the batter over the jam and sprinkle the top with large grain sugar.
Bake the loaf for about 50 minutes. The time for this one really depends on your oven, so keep checking. If the edges start to get too brown, loosely tent some tin foil over the top and keep baking. Then bake for another 10-20 minutes or until a toothpick in the middle comes out clean.
Cool in the pan for 15 minutes, then turn the cake out onto a cooling rack and let cool completely.

Wednesday, February 6, 2013

Blueberry Donut Muffins

There is a big snow storm heading our way for Friday. My recommendation for you is to get the ingredients for these muffins tomorrow, hit the snooze button on Friday, get up and make these (they whip  right up), and enjoy them with a cup of coffee and watch the snow fall.

Sounds good to me!

I think these are my favorite blueberry muffins. I love the glaze and I love the little taste of lemon that both the muffin and the glaze have. I did freeze half the batch and the defrost really well. I was surprised at that actually, with the glaze and all.


Blueberry Donut Muffins
Source: Kristine's Kitchen


Zest of 2 lemons
1/2 cup granulated sugar
1/3 cup brown sugar
1/4 cup unsalted butter, softened
1/4 cup canola oil
2 large eggs
1 tsp. pure vanilla extract
2 2/3 cups all-purpose flour
1 1/2 tsp. baking powder
1/4 tsp. baking soda
3/4 tsp. salt
1 cup milk
1 1/3 cup fresh or frozen blueberries

For the glaze:
 1 cup confectioners’ sugar, sifted
3 tbsp. unsalted butter, melted
1/2 tsp. pure vanilla extract
1 tbsp. freshly squeezed lemon juice
1 tbsp. warm water

Preheat oven to 425 degrees F. Line a muffin tin with paper muffin cups or spray with nonstick cooking spray.

In a medium bowl, combine the lemon zest and sugars. Use your fingers to blend together the zest and sugars until fragrant.

In the bowl of a stand mixer fitted with the paddle attachment, cream together the lemon sugar, butter, and canola oil until smooth. Add the eggs and vanilla and beat to combine.

In a medium bowl, whisk together the flour, baking powder, baking soda, and salt. With the mixer on low speed, add the flour mixture into the butter mixture alternately with the milk, beginning and ending with the flour, until thoroughly combined. Gently fold in the blueberries.

Spoon the batter evenly into the prepared muffin tin, filling the cups nearly to the top.

Bake for 15 to 17 minutes, or until they are pale golden brown and a toothpick inserted into the center of a muffin comes out clean. Place the muffin tin on a wire rack to let the muffins cool slightly before glazing.

Meanwhile, mix up the glaze by whisking together all of the glaze ingredients until smooth.

After the muffins have cooled in the pan for 5-10 minutes, dip each muffin top into the glaze and place on the wire rack. Once the glaze has hardened, you can either leave the muffins as they are or dip them a second time.

Serve warm. 

Tuesday, January 29, 2013

The Perfect Soft Boiled Egg

I didn't even know I liked soft boiled eggs until I saw a picture of one and drooled all over my desk. I have some extra time on my hands today (a rare occasion as a full time working mother of a toddler). I decided that for snack I would make a soft boiled egg with toast.

Wow.

Wow. Wow. Wowwy.

I could see myself becoming addicted to these. Absolute perfection. The white was perfectly cooked through while the yolk was flowing and yummy.

A sprinkle of salt and pepper is all you need.

It is the simple things in life that are the best.


The Perfect Soft Boiled Egg
Source: Eat Drink Better

1. In a medium pan, bring a half inch of water to a boil over medium heat.

2. Carefully drop in 1-6 eggs. Cover, and cook for 6 1/2 minutes.

3. Drop eggs into ice bath for 30 seconds.

4. Carefully peel and enjoy!

Sunday, January 6, 2013

Granola Bars

I've made granola bars a few times before using a recipe from Alton Brown. I saw a four ingredient one on Pinterest that caught my attention. Four ingredients, they are all super healthy, and I'm short on time! This sounded like an awesome idea.

These taste really good but they are super crumbly. I only got about half of them out of the pan in one piece. Seth is going to use some of the crumbles for his oatmeal and I'm going to put some in my yogurt in the morning.

For mix-ins I used raisins on half (Seth's favorite) and cranberries and mini chocolate chips on the other half. I put coconut over the whole thing. Yum. Oh, and don't skimp on the chia seeds. They definitely add a nice texture. Also, I didn't have enough honey so I used half honey and half agave. Maybe that is why they were crumbly, maybe the honey sticks it together more? I dunno. Still yummy.


4 Ingredient Granola Bars
Source: Savoring the Thyme


4 cups rolled oats
2 tablespoons chia seeds
3/4 cup natural peanut butter, melted
1/2 cup honey (or brown rice syrup or agave)


Mix-in ideas: raisins, dried cranberries (or any dried fruit), flax seed, coconut, chocolate chips (or peanut butter chips), wheat germ, sunflower seeds (or pumpkin)


Combine the oats and chia in a bowl (you could add nuts at this part too). Pour syrup/honey over oats and mix. Then pour the peanut butter over and mix that in. You can either fold in your mix-ins or sprinkle them on the top like I did. Bake at a 350 degree oven for 25 minutes.

Sunday, November 25, 2012

Crazy Awesome Cinnamon Rolls

You can probably tell that I've fallen by the wayside with blogging. I haven't forgotten about it but with a toddler I just don't have the time. However, when something is really really good - I take the time to do a post.

I already posted about these cinnamon rolls but I feel the need to do so again. The first time I made these I found the ratios to be really weird. After doing some research and watching Ree Drummond's show where she makes these - I see it actually makes like 50 cinnamon rolls meant to be put in foil pans and delivered to friends. Um. Share?? Me? I'll give you one to try but a whole pan?! Only if I really like you! 

So, I am posting her recipe as is but I halved this. Halving the recipe will give you either 16 smaller cinnamon rolls that will fit into two round pans (foil pan or glass pie plate). You can also make them a little bigger and do 8 rolls that would fit into a rectangle glass pan (probably a 9x10). They rise and fill out the pan so I wouldn't worry too much about which one you pick out. Also, I made the dough the afternoon before and then put it in the fridge. The next morning my husband took it out really early and then I rolled it out two hours later. Then I let the rolls rise in a warm spot. Anything to save a little time!

These are so sweet and wonderful. The glaze is amazing and the dough is fabulous. I prefer to do the larger rolls, I think the glaze to dough recipe is nicer.

Enjoy friends!!


Cinnamon Rolls
Source: Pioneer Woman - Ree Drummond

1 quart Whole Milk
1 cup Vegetable Oil
1 cup Sugar
2 packages Active Dry Yeast
8 cups (Plus 1 Cup Extra, Separated) All-purpose Flour
1 teaspoon (heaping) Baking Powder
1 teaspoon (scant) Baking Soda
1 Tablespoon (heaping) Salt
Plenty Of Melted Butter - 1 cup
2 cups Sugar
Generous Sprinkling Of Cinnamon

MAPLE FROSTING:
1 bag Powdered Sugar (2 pounder)
2 teaspoons Maple Flavoring
½ cups Milk
¼ cups Melted Butter
¼ cups Brewed Coffee
⅛ teaspoons Salt

Mix the milk, vegetable oil and sugar in a pan. “Scald” the mixture (heat until just before the boiling point). Turn off heat and leave to cool 45 minutes to 1 hour. When the mixture is lukewarm to warm, but NOT hot, sprinkle in both packages of Active Dry Yeast. Let this sit for a minute. Then add 8 cups of all-purpose flour. Stir mixture together. Cover and let rise for at least an hour.

After rising for at least an hour, add 1 more cup of flour, the baking powder, baking soda and salt. Stir mixture together. (At this point, you could cover the dough and put it in the fridge until you need it – overnight or even a day or two, if necessary. Just keep your eye on it and if it starts to overflow out of the pan, just punch it down).

When ready to prepare rolls: Sprinkle rolling surface generously with flour. Take half the dough and form a rough rectangle. Then roll the dough thin, maintaining a general rectangular shape. Drizzle 1/2 to 1 cup melted butter over the dough. Now sprinkle 1 cup of sugar over the butter followed by a generous sprinkling of cinnamon.

Now, starting at the opposite end, begin rolling the dough in a neat line toward you. Keep the roll relatively tight as you go. Next, pinch the seam of the roll to seal it.

Spread 1 tablespoon of melted butter in a seven inch round foil cake or pie pan. Then begin cutting the rolls approximately ¾ to 1 inch thick and laying them in the buttered pans.

Repeat this process with the other half of the dough. Let the rolls rise for 20 to 30 minutes, then bake at 375 degrees until light golden brown, about 15 to 18 minutes.

For the frosting, mix together all ingredients listed and stir well until smooth. It should be thick but pourable. Taste and adjust as needed. Generously drizzle over the warm rolls. Go crazy and don’t skimp on the frosting.

Monday, August 6, 2012

Raspberry Curd

I made this raspberry curd to go with meringue shells. Since it made two jars I used the other for smearing on muffins and breads. Awesome stuff.


Raspberry Curd
Source: Martha Stewart

Makes 2 cups

1 cup sugar
1 tablespoon finely grated lemon zest, plus 1/4 cup fresh lemon juice
8 large egg yolks (egg whites reserved for another use)
1/4 teaspoon coarse salt
1 1/4 sticks unsalted butter (10 tablespoons), cut into 1/2-inch pieces
1 cup raspberries

Directions
In a medium saucepan, off heat, whisk together sugar, zest, and egg yolks; whisk in lemon juice and salt.

Add butter and place pan over medium-high heat. Cook, whisking constantly, until butter has melted, mixture is thick enough to coat the back of a spoon, and small bubbles form around the edge of pan, about 5 minutes (do not boil).

Remove pan from heat while continuing to whisk. Pour curd through a fine-mesh sieve into a glass bowl. Press plastic wrap against the surface of curd and refrigerate until cool. (To store, refrigerate in an airtight container, up to 2 weeks.)

In a blender, puree 1 cup raspberries. Strain through a fine-mesh sieve into a bowl, discarding solids. Fold raspberry puree into cooled curd.
.

Read more at Marthastewart.com: Raspberry Curd - Martha Stewart Recipes

Tuesday, February 8, 2011

New York Style Coffee Cake

It is the small things in life that please a new mother. Small things like coffee cake and a cup of coffee on a snowy day.

And I mean quality coffee cake. Big chunks of crumb that melt on your tongue. And cake that is so moist and vanillay (I think I just made up a word!).

One can not resist this coffee cake...not even my health nut of a husband.

New York Style Coffee Cake
Source: Baked Explorations
Yield: 16 servings

For the crumb topping:

1 cup firmly packed brown sugar
1/2 cup granulated sugar
1/2 teaspoon salt
1 1/2 tablespoons cinnamon
1 cup (2 sticks) melted butter
2 1/2 cups all-purpose flour

For the cake:

2 1/2 cups all-purpose flour
3/4 teaspoon baking powder
1 teaspoon baking soda
1/2 teaspoon salt
12 tablespoons (1 1/2 sticks) butter
1 1/2 cups granulated sugar
2 large eggs
1 1/4 cups sour cream
1 teaspoon vanilla extract

Preheat the oven to 350 degrees. Butter the sides and bottom of a glass 9×13 pan. You can use a metal pan, but the edges may get a bit crispy.

To make the crumb topping, mix both sugars, salt, and cinnamon in a medium bowl. Add the melted butter and whisk until combined. Fold in the flour until it is absorbed. Spread out a large sheet of parchment paper on the counter and spread this mixture out on the parchment paper to dry while you make the cake mixture.

To make the cake, sift the flour, baking powder, baking soda, and slat together in a medium bowl and set aside.

Cream the butter until it is smooth and ribbon like in the bowl of a stand mixer fitted with the paddle. Scrape down the bowl and add the sugar. Beat until fluffy. Add the eggs, one at a time, and beat until incorporated. Scrape the bowl and mix again for 30 seconds. Add the sour cream and vanilla and beat just until incorporated. Add the dry ingredients in three parts, scraping down the bowl before each addition, beating only until it is just incorporated.

To assemble the cake, pour the batter in the prepared pan.Use your hands to scoop up a handful of the topping and make a fist. The topping should hold together. Break off in chunks and drop them over the cake. Repeat to use all the topping. Remember, the topping layer will look very thick.

Bake the cake for 45 to 55 minutes, or until a toothpick inserted in the middle comes out clean. Rotate the pan two times during the baking process. Cool the entire pan on a wire rack for 30 minutes before serving.

The cake will last for 3 days, tightly covered, at room temperature.

Wednesday, January 12, 2011

Malted Waffles

I love waffles and had a recipe that I used for years. The recipe called for cornmeal which gave this nice texture to the waffles. But now, I think I have found a new waffle recipe. These are so fantastic. The malt gives these a really yummy taste. They crisped right up in my new waffle iron. Next time I make these I am going to make a double batch as they do freeze well. In the mornings I just take it from the freezer and pop it in the toaster. Leggo my malted waffle fool!


Malted Waffles
Source: Baked Explorations
Yield: 8-10 waffles

2 cups flour
1 cup malt powder
2 T packed brown sugar
1 t baking soda
1 1/2 t baking powder
1/2 t salt
2 eggs, room temp
2 1/2 cups buttermilk
6 T unsalted butter, melted and cooled to room temp

Heat waffle iron.

Whisk together the dry ingredients in one bowl and the wet in another. Pour the wet into the dry and mix until just combined...do not over mix.

Pour onto waffle iron. I found I used 1 cup of batter for my large iron.

Sunday, October 3, 2010

Peach and Raspberry Jam Muffins

This is one of my best kept secrets. Well...it isn't really a secret since I got the recipe from Joy the Baker...and it definitely isn't a secret now because I'm telling you about it.

Yes. Telling you about the most versitile muffin recipe around. These have come out perfect every time I have made them. I've used strawberry jam, raspberry and blueberry jam. Along with blackberries, raspberries, and now peaches. You can mix and match flavors. And these come together so quickly. I usually whip up a batch on a weekend morning.

Life doesn't get much better than a warm muffin on a Sunday morning.


Fruit and Jam Muffins
Source: Joy the Baker
Yield: 8 muffins

6 Tablespoons unsalted butter
1/3 cup whole milk (I use skim...it is all we've got)
1 large egg
1 large egg yolk
3/4 teaspoon vanilla extract
1 1/2 cups all-purpose flour
3/4 cups sugar
1 1/2 teaspoons baking powder
3/4 teaspoon salt
1/2- 1 cup frozen or fresh raspberries or whatever berry or fruit you've got
3 Tablespoons strawberry jam or whatever fruit jam you've got

For the topping:
3 Tablespoons cold unsalted butter, cut into 1/2-inch cubes
1/2 cup all-purpose flour
3 1/2 tablespoons sugar

Put a rack in the upper third of oven and preheat to 375 degrees F. Generously butter muffin cups or line with cupcake papers.

Melt butter in a small saucepan over moderately low heat; remove from heat. Whisk in milk, egg, yolk and vanilla until well combined.

Whisk together flour, sugar, baking powder, and salt in a medium bowl. Add milk mixture and stir until just combined. Gently but thoroughly fold in the berries and the jam.

Divide batter among muffin cups and spread evenly.

For the topping:

Combine all the topping ingredients in a bowl and rub together with your fingertips until crumbly. Sprinkle evenly over batter in cups.

Bake until golden and crisp and a wooden pick inserted into center of a muffin comes out clean, 18-22 minutes. Cool in pan on a rack for 15 minutes, then run a knife around edges of muffin tops and carefully remove from cups. Serve warm or at room temperature.

Sunday, September 26, 2010

Baked Maple Cinnamon Donuts

If you love donuts but try to be healthy...you must own a donut pan. I got mine on Amazon. I saw one at Stonewall Kitchen over the weekend. You can find them. It is worth it to have warm donuts without all the fat.

I've tried a few recipes and have a few more to try. These were decent, not fantastic. Of course, I thought the best part was the cinnamon sugar on the outside. Or maybe the fact that they are lower fat so I could eat two and not feel guilty.

Anyway, go out and buy yourself a donut pan and give these a whirl. Or you could search Food Gawker and find another recipe...like pumpkin donuts. Or chocolate. Mmhmm.


Baked Maple Cinnamon Donut Recipe
Source: Cooking with my Kid
Yield: 8-10 donuts

1 cup all-purpose flour
3/4 teaspoon baking powder
3/4 teaspoon baking soda
pinch of salt
1 egg (lightly beaten)
1 6 oz container of non fat vanilla yogurt
1 tablespoon canola oil
2 teaspoons lemon juice
2 1/2 tablespoons real maple syrup
1 1/2 teaspoons cinnamon
1/2 cup sugar
2 tablespoons butter (melted)

Preheat the oven to 400 degrees.

Toss the cinnamon and sugar together and set aside. In a large bowl whisk together all the dry ingredients. In another bowl stir together oil, lemon juice, maple syrup, egg and yogurt. Make a hole in the center of the dry ingredients and pour the wet ingredients into the hole. Gently fold everything together until combined. Divide batter evenly into a greased donut pan. (I put the batter in a Ziploc bag and cut the tip off to get it into the pan) The batter will be pretty thick and airy.

Bake for 10 minutes or until golden brown. Let cool for a few moments and then flip over onto a cooling rack while still warm. Use a pastry brush to butter your donuts and then dip each donut in the cinnamon sugar mixture to coat. Makes 6 donuts.

Tuesday, September 14, 2010

Maple Oat Scones

I thought I would whip up a batch of these one morning. I took out two sticks of butter to thaw. Then I got making the dough, holy crap! A pound of butter?!?! Are you kidding me?? I had already started so I kept going and finished the recipe but dang. That is a lot of butter! I only keep a pound in stock!

I ended up with massive sized scones. I brought a bunch to my father's house to share with them and I froze some too.

The next time I make these I would definitely halve the recipe. IF I decide to make them again. They are very yummy and they don't taste overly rich and buttery but I do have a limit! (hard to believe...I know)

Maple Oat Scones
Source: Food Network Magazine
Yield: 12ish HUGE scones

3 1/2 cups all-purpose flour
1 cup whole-wheat flour
1 cup quick-cooking oats, plus additional for sprinkling
2 tablespoons baking powder
2 tablespoons granulated sugar
2 teaspoons salt
1 pound cold unsalted butter, diced
1/2 cup cold buttermilk
1/2 cup pure maple syrup
4 extra-large eggs, lightly beaten
1 egg beaten with 1 tablespoon milk or water, for egg wash

For the Glaze
1 1/4 cups confectioners' sugar
1/2 cup pure maple syrup
1 teaspoon pure vanilla extract

Preheat the oven to 400 degrees F. In the bowl of an electric mixer fitted with a paddle attachment, combine the flours, oats, baking powder, sugar and salt. Blend the cold butter in at the lowest speed and mix until the butter is in pea-size pieces. Combine the buttermilk, maple syrup and eggs and add quickly to the flour-and-butter mixture. Mix until just blended. The dough may be sticky.

Dump the dough out onto a well-floured surface and be sure it is combined. Flour your hands and a rolling pin and roll the dough 3/4 to 1 inch thick. You should see lumps of butter in the dough. Cut into 3-inch rounds with a plain or fluted cutter and place on a baking sheet lined with parchment paper.

Brush the tops with egg wash. Bake for 20 to 25 minutes, until the tops are crisp and the insides are done.

To make the glaze, combine the confectioners' sugar, maple syrup and vanilla. When the scones are done, cool for 5 minutes and drizzle each scone with 1 tablespoon of the glaze. I like to sprinkle some uncooked oats on the top, for garnish. The warmer the scones are when you glaze them, the thinner the glaze will be.

Tuesday, August 24, 2010

Vegan Banana Bread

I've shared with you my banana bread recipe. I do love that recipe but I've found another that I will be making for my family. I found this recipe in Veganomicon and it is a much less guilt banana bread. Still very tasty. Very moist. Great with a smear of peanut butter.


Vegan Banana Bread
Source: Veganomicon
Yield: One Loaf

2-3 very ripe bananas
1/4 cup applesauce
1/4 cup canola oil
1/2 cup sugar
2 tablespoons molasses
1 cup all-purpose flour
1 cup whole wheat flour
3/4 teaspoon baking soda
1 teaspoon ground cinnamon
1/4 teaspoon ground nutmeg
1/2 teaspoon salt

Preheat the oven to 350 degrees F. Lightly grease a 9 x 5-inch loaf pan.

In a large mixing bowl, mash the bananas really well. Add the sugar, applesauce, oil, and molasses, and whisk briskly to incorporate.

Sift in the flour, baking soda, spices, and salt. Use a wooden spoon to mix until the wet and dry ingredients are just combined. If you're using chocolate chips or nuts, fold them in here.

Transfer the batter to the prepared pan and bake for 45 to 50 minutes (it took 50 for me). The top should be lightly browned and a knife inserted through the center should come out clean.

Remove from the oven and let cool!

Sunday, August 22, 2010

Lemon Pull Apart Coffee Cake

I knew when I saw this coffee cake that I had to make it. The idea of the yeasty pull apart goodness had me hooked and I'm so glad I made it.

I brought this in to share with my coworkers because if left at home I would have eaten the entire thing. Everyone really enjoyed it but my father, who is a bit old school, was confused why it was called a coffee cake. I think he was expecting something more cakey, less bread like. This is almost like a cinnamon roll made into a loaf...minus cinnamon...plus lemon.

Now, I know that the recipe look daunting. It really isn't that bad. Like any yeast bread you have to let it rise so plan ahead. I promise it is worth it!


Lemon Pull Apart Coffee Cake
Source: 17 and baking
Yield: 10ish servings

Sweet Yeast Dough
About 2 3/4 cups (12 1/4 ounces) all-purpose flour
1/4 cup (1 3/4 ounces) granulated sugar
2 1/4 teaspoons (1 envelope) instant yeast
1/2 teaspoon salt
1/3 cup (2 1/2 fluid ounces) whole milk
2 ounces unsalted butter
1/4 cup (2 fluid ounces) water
1 1/2 teaspoons pure vanilla extract
2 large eggs, at room temperature

Lemon Sugar Filling
1/2 cup (3 1/2 ounces) granulated sugar
3 tablespoons finely grated lemon zest (3 lemons)
1 tablespoon finely grated orange zest
2 ounces unsalted butter, melted

Tangy Cream Cheese Icing
3 ounces cream cheese, softened
1/3 cup (1 1/4 ounces) powdered sugar
1 tablespoon whole milk
1 tablespoon fresh lemon juice

Make the Sweet Yeast Dough
Mix two cups flour, the sugar, yeast, and salt in a medium bowl with a rubber spatula. Meanwhile, in a small saucepan or in the microwave, combine the milk and the butter and heat until the butter is melted. Remove from the heat, add the water, and let rest a minute until just warm (120 to 130°F) Stir in the vanilla extract.

Pour the milk mixture over the flour-yeast mixture and, using a rubber spatula, mix until the dry ingredients are evenly moistened. Attach the bowl to the mixer, and fit the mixer with the paddle attachment. With the mixer on low speed, add the eggs, one at a time, mixing after each addition just until incorporated. Stop the mixer, add 1/2 cup of the remaining flour, and resume mixing on low speed until the dough is smooth, 30 to 45 seconds. Add 2 more tablespoons flour and mix on medium speed until the dough is smooth, soft, and slightly sticky, about 45 seconds.

Lightly flour a work surface and knead the dough gently until smooth and no longer sticky, about one minute. Add an additional 1-2 tablespoons of flour only if the dough is too sticky to work with. Place the dough in a large bowl, cover it with plastic wrap, and let it rise in a warm place (about 70°F) for 45-60 minutes or until doubled in size. An indentation made with your finger should keep its shape.

Meanwhile, make the lemon sugar filling. Mix the sugar, lemon zest, and orange zest. It’ll draw out the citrus oils and make the sugar sandy and fragrant.

Center a rack in the oven and preheat the oven to 350°F. Grease a 9″x5″ loaf pan.

Gently deflate the dough with your hand. Flour a work surface and roll the dough into a 20″ by 12″ rectangle. [She suggests using a ruler and getting this as accurate as possible, for a prettier loaf that will fit better in the pan. I also suggest making sure both sides are floured, so that the dough will be easy to lift up later.] Use a pastry brush to spread the melted butter evenly and liberally over the dough.

Use a pizza cutter to cut the dough crosswise in five strips, each about 12″ by 4″. Sprinkle 1 1/2 tablespoons of the lemon sugar over the first buttered rectangle. Top it with a second rectangle, sprinkling that one with 1 1/2 tablespoons of lemon sugar as well. Continue to top with rectangles and sprinkle, so you have a stack of five 12″ by 4″ rectangles, all buttered and topped with lemon sugar. [She suggests carefully sprinkling the sugar and pressing it in lightly to keep it from falling off.]

Slice this new stack crosswise, through all five layers, into 6 equal rectangles (each should be 4″ by 2″.) Carefully transfer these strips of dough into the loaf pan, cut edges up, side by side. it might be a little roomy, but the bread will rise and expand after baking. Loosely cover the pan with plastic wrap and let the dough rise in a warm place (70 °F [21°C]) until puffy and almost doubled in size, 30 to 50 minutes. When you gently press the dough with your finger, the indentation should stay.

Bake the loaf until the top is golden brown, 30 to 35 minutes. (I baked mine for another 10 or so minutes. It started to brown on the top so I covered it with foil). Transfer to a wire rack and let cool in the pan for 10 to 15 minutes.

Meanwhile, make the cream cheese icing. Beat the cream cheese and powdered sugar in a medium bowl with a wooden spoon until smooth, then add the milk and lemon juice. Stir until creamy and smooth.

The recipe recommends you tilt and rotate the pan while tapping on a table to release the loaf. I just carefully ran a knife around it. Flip the loaf over onto a cooling rack, then flip onto another rack so that it’s right side up. Spread the top of the warm cake with the cream cheese icing, using a pastry brush to fill in all the cracks. [You might want to put a pan or piece of wax paper under to catch any drips.]

Eat warm or at room temperature. You can also cut the cake with a knife, but wait for it to cool if you plan to do so. The cake tastes better on the first day.

Monday, April 26, 2010

Ebelskivers

Are you still there? Are you still speaking to me? I understand if not.

Sometimes life gets in the way of blogging. You know what I mean??

Can I win you back with some delightful filled pancakes also known as ebelskivers? Oh, did I notice you perk up a bit? How about that I filled half with jam and half with a Nutella buttercream? Yes? OK. Good.

My sister bought me this fancy little pan for my birthday and I just adore it. It is so easy to use. The batter is really thin but it gives you a very light and fluffy "pancake" to fill. I used strawberry jam for a few and then made a delicious filling of Nutella, butter, and cream. FABULOUS!! These were gone in no time!


Ebelskivers
Source: Williams Sonoma
Yield: A ton

1/2 cup confectioners' sugar
1/2 Tbs. ground cinnamon
1 cup seedless berry jam
4 cups all-purpose flour
5 tsp. baking powder
3/4 tsp. salt
1 cup firmly packed light brown sugar
3 eggs, lightly beaten
3 cups milk
1 1/2 tsp. vanilla extract
About 5 Tbs. unsalted butter, melted

In a small bowl, combine the confectioners' sugar and cinnamon. Transfer to a mesh sugar shaker. Fit a pastry bag with a plain round tip and fill with the jam. Set aside.

In a bowl, sift together the flour, baking powder, salt and brown sugar. In another bowl, whisk together the eggs, milk and vanilla. Whisk the egg mixture into the flour mixture until smooth.

Put 1/4 tsp. butter in each well of a filled-pancake pan. Set over medium heat and heat until the butter begins to bubble. Pour 2 Tbs. of the batter into each well. Cook until the bottoms are golden brown and crispy, 3 to 5 minutes. Using 2 wooden skewers, turn the pancakes over and cook until golden and crispy, about 3 minutes more. Transfer to a plate. Repeat with the remaining batter.

Using the tip of the pastry bag, pierce one side of each pancake and pipe jam into the center. Dust the pancakes with the confectioners' sugar mixture and serve immediately. Makes 55 pancakes.

Monday, March 29, 2010

Paula Deen's Ultimate Coffee Cake

If you are ever in a pinch and need a breakfast or brunch item to bring to a gathering, this one is perfect.

I made this for brunch with my family the last time my sister was here visiting. It was nearly gone even before the eggs and pancakes came off the griddle. This is ooey and gooey and sticky sweet. I loved it!

The best part is that it is so easy to make. Throw it together the night before and bake it off in the morning. Your friends and family will thing you are so talented. Just nod, smile and say thank you. They don't need to know you didn't slave over this all morning!

**Against Me!, Don't Lose Touch** "Constant entertainment for our restless minds. Constant stimulation for epic appetites"


Ultimate Coffee Cake
Source: Paula Deen
Yield: 8 servings

16 to 18 unbaked frozen dinner rolls
1 (3-ounce) package regular butterscotch pudding mix, not instant
1/2 cup brown sugar, packed
1/2 cup pecans, chopped
1 stick (1/2 cup) butter, melted

The night before place frozen rolls in well greased Bundt pan. Sprinkle dry pudding mix over rolls. Sprinkle brown sugar over pudding mix. Sprinkle chopped pecans over brown sugar. Pour melted butter over all. To prevent the dough from forming a hard crust while its rising overnight, cover with a damp towel or tightly wrap with plastic wrap. Let rise overnight at room temperature, about 8 to 10 hours.

Preheat oven to 350 degrees F.

Bake in oven for 30 minutes. Remove from the oven and allow to cool for 5 minutes. Turn pan over onto a serving platter to remove. Serve by pulling apart chunks with forks.

Sunday, March 14, 2010

Molasses Glazed Walnut Scones

I've been eyeing this scone recipe for a few months now. I've never made scones and really...I didn't think I even liked them. Something about this recipe sounded really good. I think it was the glaze!

I didn't have any pecans so I used walnuts instead. I feel like you could even use almonds. Also, I didn't have maple extract so I used a tablespoon or so of real maple syrup. I had just put the scones in the oven to bake when I noticed that I forgot to put in the sugar. DUH! It was too late and I figured when they came out they would be duds.

Nope! They were awesome. The glaze adds so much to them and made up for the fact that I forgot the sugar! The egg yolks make for a soft scone instead of one that easily falls apart. I will definitely make these again...with the sugar!

Molasses Glazed Walnut Scones
Source: Bon Appetit
Yield: 8 scones

2 cups all purpose flour
3/4 cup (packed) golden brown sugar
1 teaspoon baking powder
1/2 teaspoon baking soda
1/2 teaspoon salt
10 tablespoons (1 1/4 sticks) chilled unsalted butter, cut into 1/2-inch cubes
3/4 cup pecans, toasted, broken into pieces
2/3 cup buttermilk
2 large egg yolks
1 teaspoon maple extract (I used maple syrup!)

2 tablespoons whipping cream (I used skim milk)
2/3 cup powdered sugar
1/2 teaspoon mild-flavored (light) molasses

Position rack in center of oven and preheat to 400°F. Combine flour, 1/4 cup brown sugar, baking powder, baking soda, and salt in large bowl; whisk to blend. Add 6 tablespoons butter; using fingertips, rub in until butter is reduced to pea-size pieces. Mix in pecans. Whisk buttermilk, egg yolks, and extract in medium bowl. Add to flour mixture. Toss with fork until dough comes together in moist clumps. Gather dough into ball. Press dough out on lightly floured surface to 8-inch round; cut into 6-8 wedges.

Arrange wedges 1 inch apart on ungreased baking sheet. Bake until tester inserted into center comes out clean, about 16 minutes; transfer to rack.

Whisk remaining 1/2 cup brown sugar, 4 tablespoons butter, and cream in heavy small saucepan over low heat until sugar dissolves. Remove pan from heat. Whisk in powdered sugar and molasses. Spread glaze over warm scones. Let stand until glaze sets, at least 30 minutes. (Who can wait 30 minutes????)

Tuesday, February 16, 2010

The Bestest Banana Bread

Sometimes I hear people asking for a banana bread recipe. I never listen to what people give for answers because I have one tried and true recipe that I've been using since I first learned to bake.

I have quite a few recipes in my arsenal that I've decided are "the one". I have stopped looking for a better recipe.

Chocolate Chip Cookies
Chocolate Cupcakes
No Bake Cookies
Oatmeal Raisin Cookies
Black and White Cookies
Sugar Cookies
Gingersnaps

And I'm always trying to narrow down the field for others. I want to be sure that the recipe I am using is going to result in the BEST product. One that I can make when I'm 80.

This banana bread is moist, sweet, and a cinch to make. Sometimes when my sister comes up to visit she will use my father's rotten bananas to make a loaf. It lasts about 10 minutes.


Banana Bread
Source: Marge Standish
Yield: 1 wonderful loaf that you could eat in one sitting.

1/4 cup shortening
1 t salt
2 eggs
1 t baking soda
3 ripe bananas, mashed
1 cup sugar
1 1/2 cups flour

Cream shortening, add salt. Add sugar and then eggs. Sift flour and soda. Alternately mix in bananas and flour mix to the egg mixture. Pour into greased bread pan. Bake at 350 for one hour.

Thursday, February 11, 2010

Maple Syrup Pancake Muffins

Brilliant!! A muffin that tastes like a pancake smothered in sticky syrup. Yes, please!

My only gripe with these is how expensive it is to make them. The topping calls for 3/4 cup of pure maple syrup. WHY is something so delicious and natural SO expensive?? I got a smaller jug of syrup for $6 and it is almost gone. OK...not just from the muffins but from waffles and pancakes too.

Now that I've said that, you have to make these at least once. They are so worth it just for that wonderful taste. I've never made brown butter before but it gives these a deep and caramel flavor. And then the topping is sticky and gooey and wonderful. I could not keep my hands away from these little gems.

You can add anything to the batter that you would normally add to a pancake. I added chocolate chips to a few of them. Then I shared them with my friends.


Maple Syrup Pancake Muffins
Source: Joy the Baker
Yield: 12 muffins

7 Tablespoons unsalted butter
1/3 cup whole milk
1 large egg
1 large egg yolk
1 Tablespoon maple syrup
1 teaspoon vanilla extract
1 1/2 cups all-purpose flour
3/4 cup sugar
1 1/2 teaspoons baking powder
3/4 teaspoon salt

For the Maple Glaze:

3/4 cup pure maple syrup
1 Tablespoon lemon juice

Preheat oven to 375 degrees F. Grease muffin tin.

Melt butter in a small saucepan over medium heat. Melt and cook down the butter until little brown bits appear in the pan. The crackling will subside and butter will begin to brown fairly quickly after that. Keep a close eye. Remove from heat.

Whisk milk, egg, yolk, maple syrup, and vanilla until combined. Add the brown butter and stir to combine.

Whisk together flour, sugar, baking powder and salt in a medium bowl Add milk and butter mixture all at one and stir gently to combine.

Divide the batter among muffin cups and spread evenly.

Bake until golden and crisp and a wooden pick inserted into the center of a muffin comes out clean, about 18-20 minutes.

While the muffins are baking make the maple glaze.

In a small saucepan simmer maple syrup and lemon juice, stirring occasionally, until reduced to a thick (thicker than maple syrup) syrup. This will take about 15 minutes over a low flame.

Remove from heat and wait for the muffins to finish baking. When muffins are out of the oven and cool enough to handle, poke a few holes in the muffin top with a toothpick and dip each muffin top in the maple glaze. After dipping all twelve muffins, start with the first muffin you dipped and dip each muffin again.

Friday, February 5, 2010

Pioneer Woman's Cinnamon Rolls

Cinnamon rolls are one of my vices. I have many. All food related.

I saw Pioneer Woman's cinnamon rolls on her site and decided I should give them a whirl. After looking at the recipe and nearly keeling over, I decided to halve the recipe. That crazy woman wanted me to put 9 cups of flour into this?? And she claims it would feed 8 people. Um. No.

So I halved it. Thinking it was going to make 4 cinnamon rolls.

It made 4 cinnamon rolls the size of my hand, not curled into a fist, wide open...jazz hands.

Later in the week my husband and I were at Barnes and Noble and I peeked in her book. Yeah, in her book she uses the same recipe and says it will make 24. MAKE UP YOUR MIND!

I thought these were decent. I loved the icing on the top. My main complaint was that the cinnamon and sugar on the inside sort of disappeared into the dough after baking. You didn't get that traditional swirl of a cinnamon roll where you can unravel it and devour the middle.

Still, I would make these again knowing that I could halve the recipe and make 12 cinnamon rolls.


Cinnamon Rolls

Source: Pioneer Woman
Yield: 24 servings

1 quart Whole Milk
1 cup Vegetable Oil
1 cup Sugar
2 packages Active Dry Yeast
8 cups (Plus 1 Cup Extra, Separated) All-purpose Flour
1 teaspoon (heaping) Baking Powder
1 teaspoon (scant) Baking Soda
1 Tablespoon (heaping) Salt
Plenty Of Melted Butter
2 cups Sugar
Generous Sprinkling Of Cinnamon

MAPLE FROSTING:
1 bag Powdered Sugar
2 teaspoons Maple Flavoring
½ cups Milk
¼ cups Melted Butter
¼ cups Brewed Coffee
⅛ teaspoons Salt

Mix the milk, vegetable oil and sugar in a pan. “Scald” the mixture (heat until just before the boiling point). Turn off heat and leave to cool 45 minutes to 1 hour. When the mixture is lukewarm to warm, but NOT hot, sprinkle in both packages of Active Dry Yeast. Let this sit for a minute. Then add 8 cups of all-purpose flour. Stir mixture together. Cover and let rise for at least an hour.

After rising for at least an hour, add 1 more cup of flour, the baking powder, baking soda and salt. Stir mixture together. (At this point, you could cover the dough and put it in the fridge until you need it – overnight or even a day or two, if necessary. Just keep your eye on it and if it starts to overflow out of the pan, just punch it down).

When ready to prepare rolls: Sprinkle rolling surface generously with flour. Take half the dough and form a rough rectangle. Then roll the dough thin, maintaining a general rectangular shape. Drizzle 1/2 to 1 cup melted butter over the dough. Now sprinkle 1 cup of sugar over the butter followed by a generous sprinkling of cinnamon.

Now, starting at the opposite end, begin rolling the dough in a neat line toward you. Keep the roll relatively tight as you go. Next, pinch the seam of the roll to seal it.

Spread 1 tablespoon of melted butter in a seven inch round foil cake or pie pan. Then begin cutting the rolls approximately ¾ to 1 inch thick and laying them in the buttered pans.

Repeat this process with the other half of the dough. Let the rolls rise for 20 to 30 minutes, then bake at 375 degrees until light golden brown, about 15 to 18 minutes.

For the frosting, mix together all ingredients listed and stir well until smooth. It should be thick but pourable. Taste and adjust as needed. Generously drizzle over the warm rolls. Go crazy and don’t skimp on the frosting.

Friday, January 29, 2010

Hollandaise with a side of egg

I FINALLY saw Julie & Julia. I can't believe it took me so long to see the movie. I was a little surprised that I loved every minute of it. Normally the book is way better than the movie but I liked the movie more than the book in this situation. I thought Meryl Streep played a great Julia Childs. She totally cracked me up!

In the movie Julie makes hollandaise sauce and says something about egg yolks being whipped into submission. Then she and her husband eat artichokes dipped into a bowl of hollandaise. I knew, then, that I had to try making it.

Now is the part where you can give me a dirty look. I didn't use Julia Childs' recipe. I did a quick search and ended up with a Tyler Florence recipe. I kind of have a thing for him. And I trust him.

Hollandaise sauce is amazing...especially when you make it yourself. I poured mine over a poached egg served on asagio toast. Perfection.


Hollandaise Sauce
Source: Tyler Florence
Yield: 4 servings

4 egg yolks
1 tablespoon freshly squeezed lemon juice
1/2 cup unsalted butter, melted (1 stick)
Pinch cayenne
Pinch salt

Vigorously whisk the egg yolks and lemon juice together in a stainless steel bowl and until the mixture is thickened and doubled in volume. Place the bowl over a saucepan containing barely simmering water (or use a double boiler,) the water should not touch the bottom of the bowl. Continue to whisk rapidly. Be careful not to let the eggs get too hot or they will scramble. Slowly drizzle in the melted butter and continue to whisk until the sauce is thickened and doubled in volume. Remove from heat, whisk in cayenne and salt. Cover and place in a warm spot until ready to use for the eggs benedict. If the sauce gets too thick, whisk in a few drops of warm water before serving.