Sunday, May 31, 2009

Watch the clouds roll in...

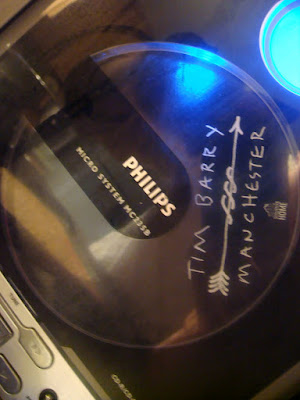
I've been listening to this CD nonstop today. Most of it sums up my life as of recent. Check out Tacoma.

Watch the clouds roll in,
Don't give me that shit about friends,
I've been there for you all along,
Lord I'll never be there for you again.

Saturday, May 30, 2009

A Studio Opening

I felt very privileged and honored when Tess J. of Tess J Photography asked me to bake some sweet treats for her studio opening. She and her partner in life and professionally, Andrew Houser of Houser Fine Art, opened a new studio in the Dana Warp Mill to do shoots and had some of their fabulous work on display. I've done two boudoir shoots with Tess, an engagement shoot, and she and Houser did our wedding photos. They continue to amaze me with their work. Check out Tess' sites:

http://www.tessjphotography.com/ (mostly boudoir photos)

http://www.weddings.tessjphotography.com/ (yeah that me!!)


And Houser's:

http://www.houserfineart.com/ (artsy nudity warning)

http://www.houserphotography.com/ (landscape photography)


In my opinion these are the two best photographers in the state of Maine.

For the studio opening I made vanilla cupcakes with my "fluffy cupcake frosting" and brownies. I had been using a Magnolia Bakery knock off recipe and decided that it wasn't THE ONE. My birthday is next month and I had been looking for a birthday cake recipe. I found this one on the Williams Sonoma site. THIS IS THE ONE! Moist but it stays together with a lighter crumb. I adore these vanilla cupcakes.


I have also found that this brownie recipe is THE ONE! I'm completely in love with these. Called On the Fence Brownies because they are a little fudgy, a little chewy, a little cakey. They will satisfy every brownie desire. I've received great compliments on these.


Though my week was quite terrible, perhaps the worst of the year, we had a great time at the opening.

And I came home with this print for our redecorated bathroom.


Williams Sonoma Birthday Cake
Yield: 2 9 inch round cakes or 24 cupcakes
Source: Williams Sonoma

2 1/4 cups all-purpose flour
1 tablespoon baking powder
1/4 teaspoon salt
12 Tbs. (1 1/2 sticks) unsalted butter, at room temperature
1 3/4 cups granulated sugar
2 teaspoons vanilla extract
3 eggs
1 1/3 cups milk

Preheat an oven to 350°F.

Grease 2 round cake pans with butter.

Sift the flour, baking powder and salt into a bowl. In a large bowl, using an electric mixer, beat the butter, granulated sugar and vanilla on medium speed until creamy, about 3 minutes. Turn off the mixer and scrape down the bowl with a rubber spatula. Add the eggs one at a time, beating well after each one is added. Turn off the mixer, add about one-third of the flour mixture and beat on low speed just until blended. Pour in 2/3 cup of the milk and beat just until blended. Repeat, adding about one-third of the flour, the remaining 2/3 cup milk and then the rest of the flour, beating after each addition just until blended.

Pour half of the batter into one prepared pan and the other half into the second pan. Using the rubber spatula, spread the batter evenly and smooth the top. Bake 30 to 35 minutes.


On the Fence Brownies
Yield: 2 dozen brownies
Source: King Arthur Flour


1 cup (2 sticks) unsalted butter
2 1/4 cups sugar
1 1/4 cups cocoa
1 teaspoon salt
1 teaspoon baking powder
1 tablespoon vanilla extract
4 large eggs
1 1/2 cups King Arthur Unbleached All-Purpose Flour
1 cup (6 ounces) chocolate chips
1 teaspoon espresso powder
1 cup chopped walnuts or pecans (optional)

In a medium-sized microwave-safe bowl, or in a saucepan set over low heat, melt the butter, then add the sugar and stir to combine. Return the mixture to the heat (or microwave) briefly, just until it's hot (about 110°F to 120°F), but not bubbling; it'll become shiny looking as you stir it. Heating this mixture a second time will dissolve more of the sugar, which will yield a shiny top crust on your brownies. Stir in the cocoa, salt, baking powder, and vanilla.


Whisk in the eggs, stirring until smooth; then add the flour, chips, espresso powder, and nuts, again stirring until smooth. Spoon the batter into a lightly greased 9 x 13-inch pan. Bake the brownies in a preheated 350°F oven for 28 to 30 minutes, until a cake tester inserted into the center comes out clean, or with just a few moist crumbs clinging to it. The brownies should feel set on the edges and in the center (barely). Remove them from the oven and cool on a rack before cutting and serving.

Thursday, May 28, 2009

Because I got laid off today...

One of my co-workers plopped this down on the desk as I sat with my teary face in my hands. Could this be the time for a REAL Sweet Cheeks Bakery? I have some thinking to do.

Wednesday, May 27, 2009

Daring Bakers: Caramelized Banana Strudel

Procrastination. Gets me every time.

I wasn't super excited about this challenge. Not until I got home from work in a MAJOR homemaker kind of mood. I swept, I mopped, I cleaned the sinks with baking soda. The house smelled great and it was only 6:00. Time to get creative because apple strudel sounds super boring to me.

I could do something savory. I could do something with chocolate. Hm. Bananas? OOooooo. Caramelized bananas. Yes. Yes. I had bananas perfect for cooking, just past the green stage. A little butter and brown sugar. I was on to something!

I melted a couple tablespoons of butter, added two chopped bananas, then sprinkled all of it with 1/4 cup of brown sugar. I let that cook down just a bit, the bananas cook and the butter and brown sugar get all ooey gooey. Oh yes. Give it a try.


*Note: I halved this since I'm the one with the sweet tooth.


The dough was so much easier to work with than I thought it would be. It easily rolled into this thin dough.


The May Daring Bakers’ challenge was hosted by Linda of make life sweeter! and Courtney of Coco Cooks. They chose Apple Strudel from the recipe book Kaffeehaus: Exquisite Desserts from the Classic Cafés of Vienna, Budapest and Prague by Rick Rodgers.

Caramelized Banana Strudel
Adapted from Kaffeehaus

Filling
4 bananas, chopped
4 T butter
1/2 cup brown sugar
Melt butter in pan. Add chopped bananas. Cook for a minute. Sprinkle with sugar and cook for 5 minutes over medium high heat. Allow to cool before putting filling in dough.

Put the rack in the upper third of the oven and preheat the oven to 400°F (200°C). Line a large baking sheet with baking paper (parchment paper). Make the strudel dough as described below. Spread about 3 tablespoons of the remaining melted butter over the dough using your hands (a bristle brush could tear the dough, you could use a special feather pastry brush instead of your hands). Sprinkle the buttered dough with the bread crumbs. Add the filling in a six inch strip on the dough.

Fold the short end of the dough onto the filling. Lift the tablecloth at the short end of the dough so that the strudel rolls onto itself. Transfer the strudel to the prepared baking sheet by lifting it. Curve it into a horseshoe to fit. Tuck the ends under the strudel. Brush the top with the remaining melted butter.

Bake the strudel for about 30 minutes or until it is deep golden brown. Cool for at least 30 minutes before slicing. Use a serrated knife and serve either warm or at room temperature. It is best on the day it is baked.

Strudel Dough
1 1/3 cups unbleached flour
1/8 teaspoon salt
7 tablespoons water, plus more if needed
2 tablespoons vegetable oil, plus additional for coating the dough
1/2 teaspoon cider vinegar

Combine the flour and salt in a stand-mixer fitted with the paddle attachment. Mix the water, oil and vinegar in a measuring cup. Add the water/oil mixture to the flour with the mixer on low speed. You will get a soft dough. Make sure it is not too dry, add a little more water if necessary.Take the dough out of the mixer. Change to the dough hook. Put the dough ball back in the mixer. Let the dough knead on medium until you get a soft dough ball with a somewhat rough surface.

Take the dough out of the mixer and continue kneading by hand on an unfloured work surface. Knead for about 2 minutes. Pick up the dough and throw it down hard onto your working surface occasionally.Shape the dough into a ball and transfer it to a plate. Oil the top of the dough ball lightly. Cover the ball tightly with plastic wrap. Allow to stand for 30-90 minutes (longer is better).

It would be best if you have a work area that you can walk around on all sides like a 36 inch (90 cm) round table or a work surface of 23 x 38 inches (60 x 100 cm). Cover your working area with table cloth, dust it with flour and rub it into the fabric. Put your dough ball in the middle and roll it out as much as you can.Pick the dough up by holding it by an edge. This way the weight of the dough and gravity can help stretching it as it hangs. Using the back of your hands to gently stretch and pull the dough. You can use your forearms to support it.

The dough will become too large to hold. Put it on your work surface. Leave the thicker edge of the dough to hang over the edge of the table. Place your hands underneath the dough and stretch and pull the dough thinner using the backs of your hands. Stretch and pull the dough until it's about 2 feet (60 cm) wide and 3 feet (90 cm) long, it will be tissue-thin by this time. Cut away the thick dough around the edges with scissors. The dough is now ready to be filled.

Tuesday, May 26, 2009

Resting my ring...

What do you do with your rings when you make pie dough? Or bread or cookie or anything dough?

My wonderful, handsome, punk hubby gave me this ring rest in my stocking last year. It is handmade by a local potter and I love having a specific place to plop my ring when I don't want it to get doughy.

I have clear and great memories of my grandmother's old hands; swollen knuckles and freckled skin with her wedding ring stuffed with biscuit dough. Every time I look at mine and I see that dough in the crevices of my diamonds I think of her and her jewelry. Mostly I think of her biscuits that no one can quite replicate.

Thursday, May 21, 2009

Soft Pretzels!

I have been wanting to make these for quite some time. When I go to visit my sister in RI for "girl's weekend" we always end up getting Aunt Annie's pretzels and a lemonade for our afternoon snack. On girl's weekend calorie don't count, of course. I vividly remember when we started girl's weekend years and years ago Mummy and I would meet Caroline in NH, half way between our house and Caroline's. I remember sitting in the hotel room with a dozen donuts. **sigh**

I figured Sunday night was the right time make these. It was a cloudy day so I couldn't be outside all day. Game 7 of the Celtics playoffs were on. This means that there is a whole lot of yelling, clapping and screaming going on in the living room. My husband would need the extra carbs to energize him for the intensity.

This recipe makes 6 large pretzels. I made 4 salted and 2 cinnamon sugar for myself. We both enjoyed the two different kinds. I prefer the cinnamon sugar only because I prefer sweet over savory foods. Hubby liked the salty. These came together very easily and are best served warm out of the oven. While they aren't just like the pretzels at the mall they do the trick to satisfy the taste buds.

Enjoy!


Almost Famous Soft Pretzels
Source: Food Network Magazine
Yield: 6 large pretzels

1 cup milk
1 package active dry yeast
3 tablespoons packed light brown sugar
2 1/4 cups all-purpose flour, plus more for kneading
10 tablespoons unsalted butter, plus more for greasing
1 teaspoon fine salt
1/3 cup baking soda
2 tablespoons coarse salt

Warm the milk in a saucepan until it's about 110 degrees; pour into a medium bowl and sprinkle in the yeast. Let the yeast soften, about 2 minutes; stir in the brown sugar and 1 cup flour with a wooden spoon. Dice 2 tablespoons butter and soften; stir into the mix. Add the remaining 1 1/4 cups flour and the fine salt to make a sticky dough. Turn the dough out onto a lightly floured surface and knead, adding more flour if needed, until smooth but still slightly tacky, about 5 minutes. Shape into a ball, place in a lightly greased bowl and cover with plastic wrap. Let rise in a warm spot until doubled in size, about 1 hour.

Preheat the oven to 450 degrees and grease a large baking sheet. Punch the dough to deflate it, then turn out onto a lightly floured surface. (If the dough seems tight, cover and let rest until it relaxes.) Divide the dough into 6 pieces. Roll and stretch each piece with the palms of your hands into a 30-inch rope, holding the ends and slapping the middle of the rope on the counter as you stretch. Form each rope into a pretzel shape.

Dissolve the baking soda in 3 cups warm water in a shallow baking dish. Gently dip each pretzel in the soda solution, then arrange on the prepared baking sheet and sprinkle with the coarse salt. Bake until golden, 10 to 12 minutes.

Melt the remaining 8 tablespoons butter in a shallow dish. Dip the hot pretzels in the butter, turning to coat; place on a wire rack to let excess butter drip off. **I forgot to do this step. I did it for the cinnamon sugar variety only to get the sugar to stick but I didn't do it for the salted pretzels. Next time I will. A little extra butter makes everything OK.

Tuesday, May 19, 2009

What's Blooming at 179

We are so lucky. Thank you Grampy for our gorgeous back yard.

How appropriate that Grampy planted Forget Me Nots. I love these little blue flowers.

Spearmint and Applemint. Notice the difference in leaves. Applemint leaves are a bit fuzzy.

One of Seth's favorite perennials because it looks like the Trio logo.

Purple Lilac. Almost fully bloomed.

A Maine endangered plant. Jack in the Pulpit. I'm lucky enough to have three!

White Lilac. A huge full and fragrant bush.

Stanley Plum. I hope this year I will have some plums!

Flowering Almond. A gorgeous little bush that I'd like to transplant.

Apple. I can't quite remember what kind.


My dad's girlfriend bought me these herbs the other day. Chive and Golden Oregano. Very excited about my little herb garden!


Sunday, May 17, 2009

Charred Corn Guac

I started making this recipe for gatherings a few years ago. I'm not a fan of Bobby Flay but I happened to be watching his show and saw this. Every time I make it people rave. Most recently I made it for a small group of friends at my home. People would take a bite and try to dissect it to figure out what was in there. I love that!!

In the winter time I use canned corn but it is best made with charred corn on the grill. I cook it in the husk to retain the moisture and then char the outside quickly for some color. This is definitely one of my favorite summertime salads.


Charred Corn Guacamole
Source: Food Network
Yield: 4 servings

2 ears corn
4 tablespoons canola oil
Salt and freshly ground black pepper
3 ripe avocados, peeled, pitted and diced
1 serrano chile, finely diced
1 small red onion finely diced
1 lime, juiced
1/4 cup chopped cilantro leaves
corn chips, as accompaniment

Heat the grill to high.
Remove the husks from the grilled corn and discard. Brush the ears of corn with 2 tablespoons of the canola oil and season with salt and pepper. Grill the ears until the kernels are lightly golden brown on all sides, about 5 minutes. Remove the kernels from the ears.

Place the avocado in a medium bowl. Add the corn, serrano, onion, lime juice, remaining 2 tablespoons of oil, cilantro and salt and pepper and gently stir to combine. Serve with fried corn chips or warm flour tortillas.
Thursday, May 14, 2009

(Maine!) Shrimp Scampi

Swoon. Tyler Florence.

I bought nearly 10 pounds of Maine shell on shrimp from my local fish market. It took me nearly an hour and a half to shell them. Ick. I ended up with about 5 servings of shrimp so it was worth it. Now what to do with them?

When looking for a certain recipe I will start with either Food Gawker or Food Network. I had all this shrimp and decided shrimp scampi would be on the menu for dinner. I looked on Food Network which listed a few different recipes. I saw one from Tyler Florence and knew I could trust it. He pulled through. My husband and I really enjoyed this dish. The crushed red pepper gives it just a little bit of heat. Served with garlic toast. A very tasty meal.


Shrimp Scampi
Source: Food Network
Yield: 4 servings

1 pound linguini
4 tablespoons butter
4 tablespoons extra virgin olive oil, plus more for drizzling
1 large shallot, finely diced
5 cloves garlic, sliced
Pinch red pepper flakes, optional
20 large shrimp, about 1 pound, peeled and deveined, tail on
Kosher salt and freshly ground black pepper
1/2 cup dry white wine
1 lemon, juiced
1/4 cup finely chopped parsley leaves

For the pasta, put a large pot of water on the stove to boil. When it has come to the boil, add a couple of tablespoons of salt and the linguini. Stir to make sure the pasta separates; cover. When the water returns to a boil, cook for about 6 to 8 minutes or until the pasta is not quite done. Drain the pasta reserving 1 cup of water.

Meanwhile, in a large skillet, melt 2 tablespoons butter in 2 tablespoons olive oil over medium-high heat. Saute the shallots, garlic, and red pepper flakes (if using) until the shallots are translucent, about 3 to 4 minutes. Season the shrimp with salt and pepper; add them to the pan and cook until they have turned pink, about 2 to 3 minutes. Remove the shrimp from the pan; set aside and keep warm. Add wine and lemon juice and bring to a boil. Add 2 tablespoons butter and 2 tablespoons oil. When the butter has melted, return the shrimp to the pan along with the parsley and cooked pasta and reserved pasta water. Stir well and season with salt and pepper. Drizzle over a bit more olive oil and serve immediately.

Sunday, May 10, 2009

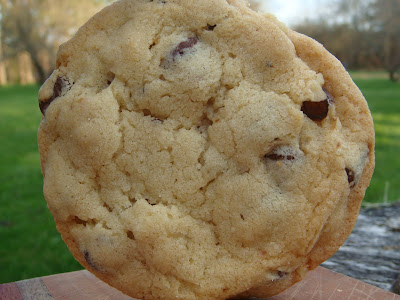
Chunky Monkey Chocolate Chip Cookies

I had a bad day the other day. Actually I had a bad week. As soon as I walked through the door on that particularly bad day I preheated the oven knowing exactly what I needed. Warm chocolate chip cookies. They will always melt away my problems for at least 5 minutes.

As a little girl my mother worked part time and was home when I got off the school bus. A favorite memory of mine was getting off the bus and going into the house when it smelled like Pine Sol and chocolate chip cookies. Its weird and as I have said in previous posts...I'm weird. Supposedly my mother loved the smell of Pine Sol when she was pregnant with me and would sniff the bottle. I'm not recommending this for anyone but in this circumstance it worked out OK. So what if she thought I was retarded as a baby.

It took me years to come up with my recipe for chocolate chip cookies. I have tried Alton Brown's, Cooks Illustrated, Julia Child's, no namers. At some point I ended up combining various recipes and love the result. Victoria is a fan of these and nick named them "chunky monkey" chocolate chip cookies because of the extra chocolate chips and walnuts.


Chunky Monkey Chocolate Chip Cookies
Source: ME!
Yield: 2 dozen or so...

3/4 cup butter flavor Crisco (or margarine or a combo of margarine and shortening)
1 cup sugar
1/2 cup brown sugar
1 egg
2 1/4 cup flour
1 t. baking soda
1 t. salt
1 t. vanilla
12 oz. chocolate chips plus more if you want
1/2 cup chopped walnuts

Mix the butter/shortening/margarine with sugars. Add egg. Gradually add dry ingredients. add vanilla. Stir in chips and nuts. Bake at 325 until the edges are golden.

I like to freeze the dough and take a few out for dessert on bad days. Or happy days too!

Wednesday, May 6, 2009

Bake for Hope Results

Today was a marvelous day.

Let me start from the beginning.

I packed up my car with all the goodies made by me, shipped from my sister and my Nestie friend Erica, and treats from the Nestie gals in Lewiston. I got to Higher Grounds just as Jonah (the owner) was vacuuming and my little brother came shortly after with treats made by him and his mother. Soon after that Tina was there, Victoria and Kacey too. All the tables but one were covered with treats. We left that one open in case people wanted to sit down and enjoy their sweet.

People started trickling in and Tony and Tina stayed to help me. As lunch time got closer people started coming in packs. People from my father's office, my MIL's office, and my own. Then there were the people that I never met. One couple in particular were looking around and the man came over to me and said, "that's my wife. She's a survivor of seven and half years." You could hear the love and pride in his voice. They had seen the article in the KJ and drove from Bowdoin. One woman came with a tin of goodies and two cards. I opened the cards and they were from women that I've never met. They saw the article and wanted to help. Their cards told me about their daughters that battled cancer. I was so touched. One of those same women came back later to drop off a check from her neighbor. She told me she was a survivor herself and wanted me to know that my efforts were not going unnoticed. That is all the reward a person in my position can ask for.

My last visitor of the day was one that I don't remember ever seeing before today. She came in as we were packing up and asked if I was Brianne. I said yes and she said she came to see me. She explained that she grew up near my mother and that they graduated high school together, they were great friends. Then she moved away as young graduates do. She came back years later and ran into my mother. They both had been battling cancer and bonded all over again. She told me that she misses my mother and thinks of her often. We talked about Mummy, Grammy and Grampy. I love listening to people tell stories of their friendship with Mummy. They think she was just as great as I do.

After getting home and resting a few minutes I counted the money. $862!! I could not be more pleased. Thank you to all my volunteers and thank you to each person that stopped in to buy something. You all helped me make a difference today.


Please check out my article in the Kennebec Journal (thanks for hooking this up Kacey!) and in the Valley Voice (thank you Alex!)

This is just the stuff from my house!


These pictures sort of stink but I want you to see all the food that was there! (yes that is pizza!)


Chocolate coconut marshmallows made by the lovely Tina.

You know I love my ladies.

Monday, May 4, 2009

Hope is Happening (So is Sushi)

We had our monthly girl's baking day held at Kacey's house! As I've mentioned before the hostess gets to pick what we make and what we have for lunch. Kacey wanted to make Bakerella's cake pops and sushi. Great choices!

We were each successful at rolling our own sushi roll. We stuffed them with mushrooms, carrots, cucumbers, avocado and imitation crab. Kacey made homemade spicy mayo which was fantastic. She also made a cold soba noodle salad. We had a great time sitting on the floor stuffing ourselves with Asian food.


We intended to make our cake pops look like boobies for the Bake for Hope bakesale. After much discussion we decided we weren't going to be overly successful at that and went for simply decorated cake pops. I adore them.


Cake Pops
Source: Bakerella
Yield: 3 dozen

1 box cake mix (any kind)
1 can frosting (any kind)
Chocolate coating of some sort

Bake cake per directions using any cake pan. While cake is still hot crumble into a large bowl. Add can of frosting. Roll into 1 inch balls. At this point you can insert the sticks. Dip them in the chocolate and then press into the cake ball. Refrigerate until solid. Now dip in chocolate and decorate. Have fun with this!!!

Sunday, May 3, 2009

Sangria and Supporting the Economy

We've done our job of helping the economy for the month of May! New Cub Cadet riding mower. Seth is a happy boy. I just love the green grass!

Things at 179 are really starting to bloom! The daffodils, tulips, and magnolia are in full bloom. The lilac has buds. The lilies are coming up. The mint has returned!


My favorite springtime bloom. The magnolia. The smell is amazing.

Tulips and daffodils on the side of the house.

All of the daffs and tulips were planted by my grandfather. I love that.

This isn't something that normally grows in this planter...must be a weed!


This is what I wait for all winter. All those nights listening to the wind blow snow against my window and shoveling my car out of 3 feet of snow at 7:00 a.m. are a distant memory when I sit looking at the green grass with a sangria and my husband. The whole world disappears. We are in a bubble and I can live in the bubble for eternity. Well...add some chocolate, the cats, the rest of my family, and my iPod. It is bliss.

Sangria
Source: ME!
Yield: 4 glasses

1 bottle red wine
1 orange
1 lemon
1 lime
2 T sugar (I use simple syrup when I have it)
1 shot brandy
Club soda or ginger ale
Pour wine into pitcher and squeeze in fruit. Add sugar and brandy. Stir. Chill. When ready to serve pour over ice and top with soda.