Do not waste your money buying chocolate syrup anymore. Making it at home is crazy simple and a lot cheaper too. This took me about 2 minutes to do. I've been putting it in almond milk for a sweet treat.
Homemade Chocolate Syrup
Source: ME!
1/2 cup cocoa
1 cup sugar
pinch of salt
1 t. vanilla
1/2 warm water
Put it all in a mason jar and a shake, shake, shake.
Showing posts with label Dessert. Show all posts
Monday, March 4, 2013
Saturday, February 9, 2013
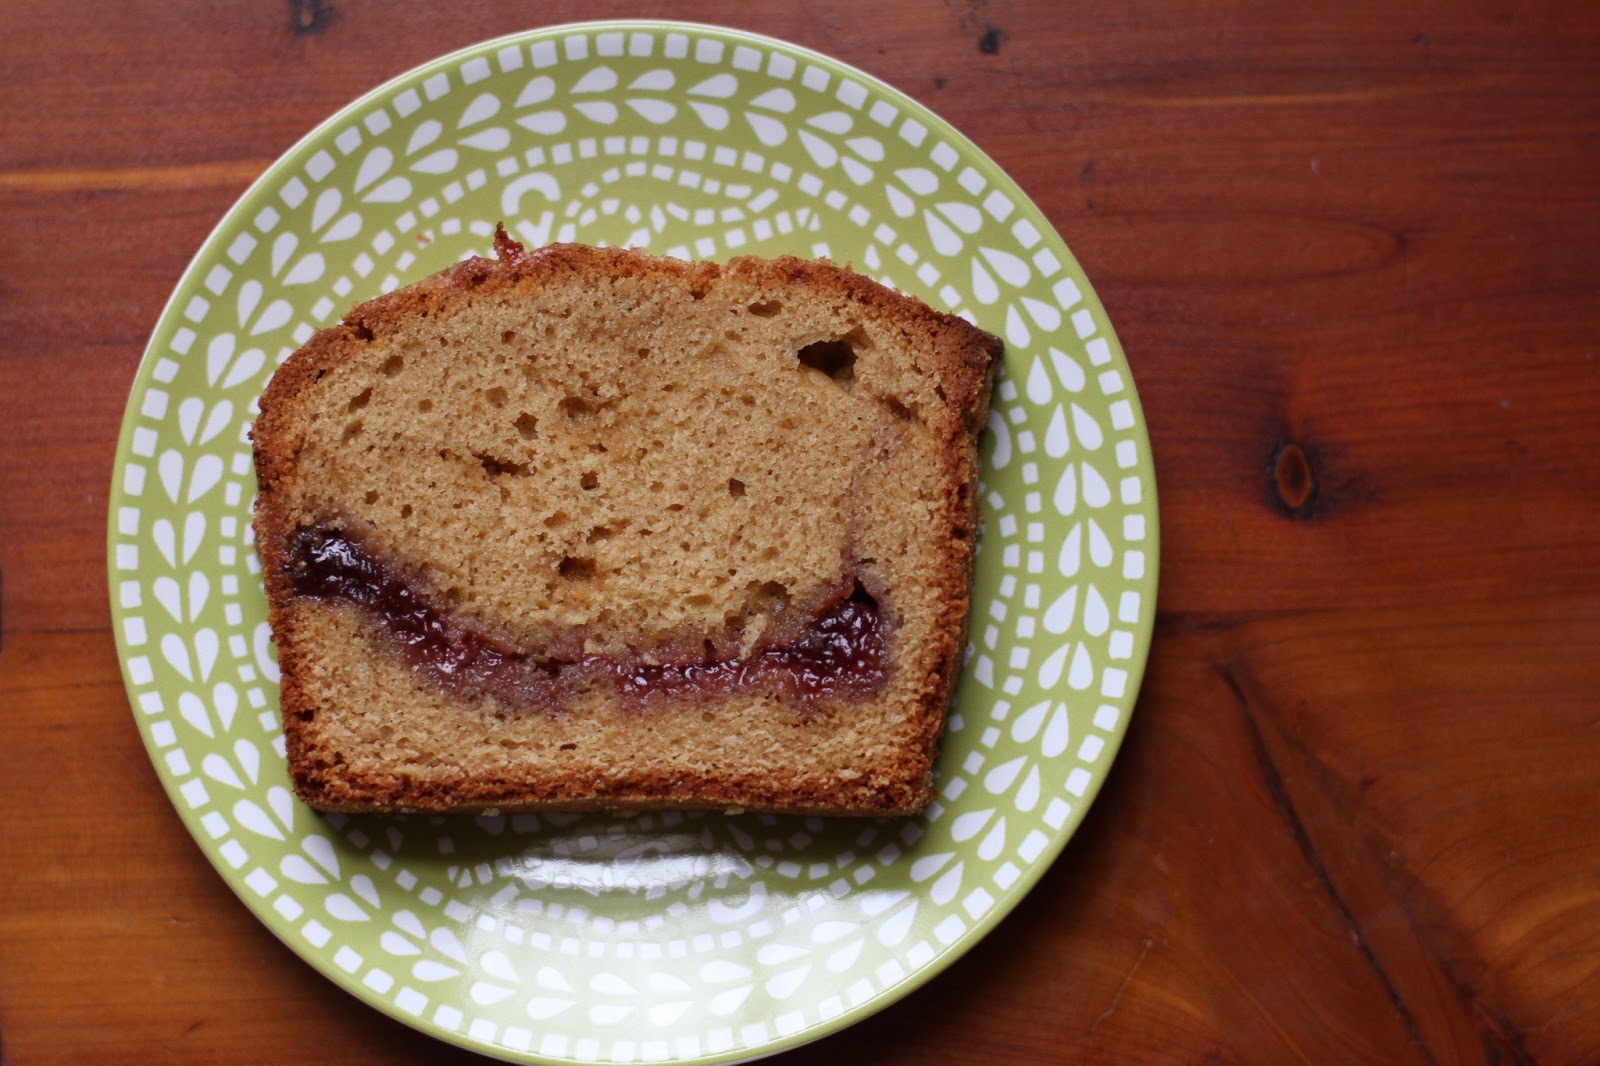
Peanut Butter and Jelly Loaf
We are in the midst of a blizzard here in Maine. Daycare was closed for a half day yesterday so Abe and I whipped this up after naptime. As you probably know and agree, snowy days are perfect for baking. I love baking with my two year old.
This loaf came out excellent. I used Trappist strawberry jam made in Massachusetts. I did end up tenting it with foil toward the end and baking it another 15 minutes, it wasn't done in the middle after 50 minutes.
Peanut Butter and Jelly Loaf
Source: 17 and Baking
This loaf came out excellent. I used Trappist strawberry jam made in Massachusetts. I did end up tenting it with foil toward the end and baking it another 15 minutes, it wasn't done in the middle after 50 minutes.
Peanut Butter and Jelly Loaf
Source: 17 and Baking
1 1/2 cups all-purpose flour
1/2 tsp baking powder
1/4 tsp baking soda
1 tsp salt
1/2 cup whole milk, room temperature
1 tsp vanilla extract
3/4 cup creamy, all natural peanut butter (with no added
palm oil)
2 oz (1/2 stick) butter, room temperature
3/4 cup granulated sugar
1/2 cup packed dark brown sugar
3 eggs, room temperature
1/2 cup jam
Preheat the oven to 350 F. Butter a 9×5″ loaf pan and coat
it with sugar.
Sift the flour, baking soda, baking powder, and salt into a
small bowl. In another bowl, stir the jam to break it up and get it loose.
In the bowl of a stand mixer, cream the peanut butter,
butter, and sugars on medium high speed for a full five minutes. The mixture
won’t get light and fluffy and the sugar won’t dissolve, but the mixture will
be less grainy.
Beat in the eggs one at a time, mixing well after each one
and scraping down the sides of the bowl.
Beat in half the flour mixture, then the milk and vanilla
extract, then the rest of the flour, scraping the sides of the bowl. The batter
will be thin. Pour half the batter into the loaf pan and dollop with jam. Pour
the rest of the batter over the jam and sprinkle the top with large grain
sugar.
Bake the loaf for about 50 minutes. The time for this one
really depends on your oven, so keep checking. If the edges start to get too
brown, loosely tent some tin foil over the top and keep baking. Then bake for
another 10-20 minutes or until a toothpick in the middle comes out clean.
Cool in the pan for 15 minutes, then turn the cake out onto
a cooling rack and let cool completely.
Thursday, January 3, 2013
Avocado Chocolate Pudding
I have a recipe for a "healthy" chocolate pudding that I'm pretty in love with. It is made with silken tofu and I love that I can eat it and have an added protein boost. I shared the recipe with a girl that I know that likes to eat healthy and she shared one of her recipes for chocolate pudding made with avocado. I was so intrigued! While the pudding I had been making called for sugar, this one called for agave or honey. I gave it a try today. Very good! Nice and rich and chocolatey.
Avocado Chocolate Pudding
Yield: 3-4 small servings
1 avocado cut into chunks
1/2 cocoa (I used the extra dark kind)
1/4 agave or honey
1/4 soy or almond milk
2 t. vanilla
Put all of this in the food processor and let her rip!
Avocado Chocolate Pudding
Yield: 3-4 small servings
1 avocado cut into chunks
1/2 cocoa (I used the extra dark kind)
1/4 agave or honey
1/4 soy or almond milk
2 t. vanilla
Put all of this in the food processor and let her rip!
Sunday, October 21, 2012
Pumpkin Whoopies with Cinnamon Maple Cream Cheese Filling
It's been a while but I couldn't keep these from my foodie friends. These are based on a recipe from Hannaford's Fresh Magazine that you pick up at the grocery store. I think it is a few years old and now I have tried all of the whoopie recipes that was in this particular issue. All of them are amazing and perfect.
The changes I made are minor. I added a little maple extract to the cake part. For the filling I didn't have 8 ounces of cream cheese - just 6 ounces. So I added 2 more ounces of butter to make up for it. I also added 2 teaspoons of maple extract and two shakes of cinnamon.
Perfection.
Pumpkin Whoopie Pies with Cinnamon Maple Cream Cheese Filling
Source: Adapted from Hannaford Fresh Magazine
Yield: 2 dozen small
11/2 cup Light brown sugar
3/4 cup Canola oil
2 1/2 teaspoon vanilla extract, divided
2 each Egg
15 oz Canned pumpkin puree (not pie filling)
3 cup All purpose flour
1 teaspoon Baking Powder
1 teaspoon Baking Soda
1/2 teaspoon Salt
3/4 teaspoon Cinnamon, ground
1/4 teaspoon Cloves, ground
1/4 teaspoon Ginger, ground
1/4 teaspoon Nutmeg, ground
1 teaspoon maple extract
8 oz Cream cheese
1/4 cup Unsalted butter, room temperature
41/2 cup Confectioners` sugar
1 teaspoon vanilla
2 teaspoons maple extract
1 teaspoon vanilla
2 teaspoons maple extract
1. Preheat oven to 350 degrees F. Coat two baking sheets with cooking spray or line with parchment paper and set aside.
2. In a large mixing bowl, use an electric mixer on medium speed to mix brown sugar, oil, and 1 1/2 tsp. vanilla until well blended, about 3 minutes. Add eggs, one at a time, mixing until smooth after each egg. Add pumpkin and mix until incorporated.
3. In a separate bowl, stir together flour, baking powder, baking soda, salt, cinnamon, cloves, ginger, and nutmeg. Add half the flour mixture to the pumpkin mixture and mix on medium speed until smooth. Scrape down sides with a rubber spatula, and remaining flour mixture, and mix well.
4. Drop 2-Tbsp. portions of batter onto prepared baking sheets, leaving 2 inches between each portion to allow for spreading. Bake for 11 to 13 minutes, until puffed and set but still soft when touched lightly with fingertips. Let cakes cool for 3 minutes on baking sheets before transferring them to wire racks to finish cooling, about 15 to 20 minutes. Repeat with remaining batter.
5. Prepare filling while cakes are baking and cooling. In a large mixing bowl, use an electric mixer on medium speed to mix cream cheese and butter until creamy. Add 1 tsp. vanilla and half the confectioners' sugar; mix on low at first to combine, then on high until smooth. Add remaining confectioners' sugar and mix until smooth, about 3 to 4 minutes.
6. Assemble whoopie pies. Spoon filling onto the flat sides of half the cakes, dividing it evenly. Top with remaining cakes, flat side against the filling, rounded side up. Serve immediately, or wrap each whoopie pie individually in plastic wrap and store at room temperature for up to two days, or in freezer for up to two months.
Monday, August 6, 2012
Raspberry Curd
I made this raspberry curd to go with meringue shells. Since it made two jars I used the other for smearing on muffins and breads. Awesome stuff.

Raspberry Curd
Source: Martha Stewart
Makes 2 cups
1 cup sugar
1 tablespoon finely grated lemon zest, plus 1/4 cup fresh lemon juice
8 large egg yolks (egg whites reserved for another use)
1/4 teaspoon coarse salt
1 1/4 sticks unsalted butter (10 tablespoons), cut into 1/2-inch pieces
1 cup raspberries
Directions
In a medium saucepan, off heat, whisk together sugar, zest, and egg yolks; whisk in lemon juice and salt.
Add butter and place pan over medium-high heat. Cook, whisking constantly, until butter has melted, mixture is thick enough to coat the back of a spoon, and small bubbles form around the edge of pan, about 5 minutes (do not boil).
Remove pan from heat while continuing to whisk. Pour curd through a fine-mesh sieve into a glass bowl. Press plastic wrap against the surface of curd and refrigerate until cool. (To store, refrigerate in an airtight container, up to 2 weeks.)
In a blender, puree 1 cup raspberries. Strain through a fine-mesh sieve into a bowl, discarding solids. Fold raspberry puree into cooled curd.
.
Read more at Marthastewart.com: Raspberry Curd - Martha Stewart Recipes
Thursday, April 5, 2012
Peanut Butter Pretzel Bites
These little pretzel bites are so easy to make. Basically you make a peanut butter ball, squish it between two pretzels, and then dunk half of it in dark chocolate. You can use milk chocolate if you want, I had dark already melted for another project so I whipped these up. YUM!
Peanut Butter Pretzel Bites
Source: 17 and Baking
1 cup creamy peanut butter
2 tsp butter, room temperature
2/3 cup powdered sugar
3/4 cup light brown sugar
1/4 tsp vanilla extract
Pretzels
2 cups bittersweet chocolate chips
2 tsp butter, room temperature
2/3 cup powdered sugar
3/4 cup light brown sugar
1/4 tsp vanilla extract
Pretzels
2 cups bittersweet chocolate chips
In a small bowl, beat the peanut butter and butter together until smooth and creamy. Beat in the powdered sugar, light brown sugar, and vanilla extract until well mixed – you may need to add more to get the filling thick and stiff enough to hold its shape.
Roll teaspoons of the peanut butter mixture between your palms to form balls. Sandwich between two pretzels and put on a plate or cookie sheet. Freeze the pretzel sandwiches for half an hour.
Melt the chocolate chips, using the microwave (30 second intervals) or a double boiler. Dip half of each pretzel sandwich in chocolate. Return the tray to the freezer and chill until the chocolate sets. Store the Peanut Butter Pretzel Bites in the refrigerator until serving time.
Wednesday, February 1, 2012
Caramel Popcorn with Peanuts and Chocolate
Need a sweet treat to bring to a superbowl party? How about popcorn and peanuts coated with sweet, sticky caramel and then drizzled with dark and milk chocolate?
Yes?
Good, because I have the recipe for it! This stuff is super amazing and really addictive!
Place the roasting pan in the oven and bake for
15 minutes. Use a spatula to lift, flip, and coat the popcorn in the warm
caramel, then continue baking for another 20 minutes. Cool the caramel popcorn
in the pan for 5 minutes and transfer it to the lined sheet pan. Cool for
approximately 15 minutes and drizzle the milk chocolate and dark chocolate in
crisscross patterns over the top. Let the chocolate set before breaking the
popcorn into serving-size pieces. Store in an airtight container for up to 1
week.
Yes?
Good, because I have the recipe for it! This stuff is super amazing and really addictive!
Caramel Popcorn with Peanuts and Chocolate
Source: Baked Explorations
1 cup unpopped kernels or 24 cups popped corn
1 cup (2 sticks) unsalted butter, cut into chunks
2 cups firmly packed dark brown sugar
½ cup light corn syrup
2 tablespoons unsulfured molasses
½ teaspoon salt
¾ teaspoon baking soda
1½ teaspoons pure vanilla extract
1¼ cups salted peanuts
8 ounces good-quality milk chocolate, melted
8 ounces good-quality dark chocolate (60 to 72%), melted
If you are starting with kernels, pop them using any method
you prefer and let them cool. (We like a hot-air popper.) Preheat the oven to
250 degrees F. Place the popcorn in a large roasting pan. Line a sheet pan with
parchment paper.
In a medium saucepan over low heat, start to melt the
butter. Add the brown sugar, corn syrup, and molasses, and stir gently with a
heatproof spatula. Continue to cook over medium heat, stirring only
occasionally, until the mixture starts to boil. Clip a candy thermometer to the
side of the pan and bring the syrup to the soft-ball stage, approximately 240
degrees F. Remove the pan from the heat and stir in the salt, the baking soda,
and vanilla. Pour the caramel over the popcorn in large streams, then sprinkle
with the peanuts. Use your spatula to fold the popcorn until it is completely
coated with caramel.
Monday, January 9, 2012
Chex Lemon Buddies
Hi. Are you mad at me? I mean, for not blogging for a really long time? I have a good excuse. I swear. His name is Abe. He's 14 months old. He keeps me extremely busy. But don't worry. I've been cooking and baking a lot and I've been taking pictures of most of it.
I'll try to do better. I vow to make time to blog about food. I mean, I think about it enough I might as well put it on the Internet.
While making traditional Chex Mix for the holidays I noticed a new recipe on the back of the cereal box, "Lemon Buddies." Um. Yes. Please. In my head I was imaging lemon cooler cookies from the 80s. Remember those??
These weren't as good as a lemon cooler cookie (it is cereal after all) but they were very good, easy to make, and so addicting. I brought them into work today to get them out of my house.
And Abe approved of them.
Lemon Buddies
Source: Chex Cereal
Yield: 9 cups (be ready to share or get a tummy ache)
9 cups Rice Chex cereal
1 1/4 cups white vanilla baking chips
1/4 cup butter
4 teaspoons grated lemon peel
2 tablespoons fresh lemon juice
2 cups powdered sugar
Into large bowl, measure cereal; set aside.
In 1-quart microwavable bowl, microwave chips, butter, lemon peel and juice uncovered on High 1 minute; stir. Microwave about 30 seconds longer or until mixture can be stirred smooth. Pour mixture over cereal, stirring until evenly coated. Pour into 2-gallon resealable food-storage plastic bag.
Add powdered sugar. Seal bag; gently shake until well coated. Spread on waxed paper or foil to cool. Store in airtight container.
Thursday, November 3, 2011
Peanut Butter Whoopie Pies
A couple years ago Hannford put out a bunch of whoopie pie recipes in their Fresh magazine. Those are the best recipes I have found. I love all of them and my favorite of them might be the reverse whoopie pie. I dunno, this one is pretty close to number one too.
I thought it was really weird that there is cream cheese in the peanut butter filling. Belive me people, it works. It is amazing. So creamy. Wonderful. GIVE ME SOME!

Peanut Butter Whoopie Pies
Source: Fresh Magazine
Yield: 15 or so
7/8 cup unsalted butter, room temperature (I took this directly from their site, I think it is 2 sticks...I'll check later)
1 cup Sugar
2 each Egg
2 teaspoon Vanilla extract
3 cup All purpose flour
2/3 cup Unsweetened cocoa powder
2 teaspoon Baking Soda
1/2 teaspoon Salt
11/2 cup Cultured low fat buttermilk
6 oz Cream cheese
1/2 cup Creamy peanut butter
41/2 cup Confectioners or powdered sugar, sifted
2 tablespoon Milk
Preheat oven to 350 degrees F. Coat two baking sheets with cooking spray or line with parchment paper and set aside.
In a large mixing bowl, use an electric mixer on medium speed to mix butter and brown sugar until well blended, about 3 minutes. Add eggs, one at a time, mixing until smooth after each egg. Mix in vanilla extract.
In a separate bowl, stir together flour, cocoa powder, baking soda and salt. Add half the flour mixture to mixing bowl and mix on medium speed until combined. Add half the buttermilk and mix again on medium until smooth. Repeat with remaining flour and buttermilk, and mix until smooth. Batter will be thick and slightly springy.
Drop 2-Tbsp. portions of batter onto prepared baking sheets, leaving 2 inches between each portion to allow for spreading. Bake 11 to 13 minutes, until puffed and set but still soft when touched lightly with fingertips. Let cakes cook for 3 minutes on baking sheets before transferring them to wire racks to finish cooling, about 15 to 20 minutes. Repeat with remaining batter.
Prepare filling while cakes are baking and cooling. In a large mixing bowl, use an electric mixer on medium speed to mix crea, cheese, peanut butter, vanilla and salt until creamy. Add half the confectioners' sugar and mix on low first to combine, then on high until smooth. Add remaining confectioners' sugar and milk and blend on low, then on medium until light and fluffy, about 3 to 4 minutes.
Assemble whoopie pies. Spoon filling onto the flat sides of half the cakes, dividing it evenly. Top with remaining cakes, flat side against the filling, rounded side up. Serve immediately, or wrap and store at room temperature for up to two days, or in freezer for up to two months.
Saturday, August 20, 2011
Vegan Peanut Butter Mousse
This is a quick, easy, and "healthy" mousse.
Tofu and peanut butter.
That's about it!
I swear it is good.
Do it. Do it now.
Vegan Peanut Butter Mousse
Source: Food Network Mag
Yield: 4 servings
Puree one 12.3-ounce package silken tofu and 1/3 cup each reduced-fat creamy peanut butter and confectioners' sugar in a blender until smooth. Divide among glasses, cover with plastic wrap and refrigerate until set, at least 30 minutes. Top with a dollop of Fluff and sprinkle with chopped peanuts and/or chocolate.
Friday, August 19, 2011
Frozen Summer Berries with Warmed White Chocolate
This one is for Brandi who is tired of reading about baby food!
Brandi, I hope you like white chocolate. If so, I suggest you go find some berries.
I saw this on the Fromogette blog and knew I needed to make it this summer. Not only did it look delicious but those frozen berries looked really photogenic, and they were.
These berries are all local. Awesome, right?? The strawberries and raspberries are from Litchfield. The blueberries are from my house and my father's house. The blackberries are from Dresden. Each little berry is perfection. So dang yummy.
White chocolate melted with some heavy cream to pour over the berries. YES PLEASE!
Bliss.
Frozen Berries with Warmed White Chocolate
Adopted from The Fromogette
Yield: One serving
A cup of mixed local berries, frozen and then left to thaw for 5-10 minutes
2.5 ounces quality white chocolate
1/4 cup heavy cream
Melt the chocolate in the cream over double boiler. Pour over berries. Wow.
Thursday, July 21, 2011
Ice Cream Sandwiches
It is 90 degrees in Maine.
We Mainers - we don't deal with the heat too well.
Throw us a Nor'Easter and frigid temperatures and we are fine. Once the mercury goes over 80 we get melty.
You know what helps me cope...ice cream. You know how to take ice cream to the next level...put it between two awesome cookies.
Yes. These are amazing and awesome. I would have made my own ice cream but the freezer is packed with frozen baby food so I have no room for the ice cream bucket.
Chewy Chocolate Cookies for Ice Cream Sandwiches
Source: Laura's Recipe Collection (who's Laura??)
Yield: about a dozen or more sandwiches
2 cups all-purpose flour
¾ cup unsweetened Dutch-process cocoa powder
1 teaspoon baking soda
½ teaspoon salt
1¼ cups unsalted butter, at room temperature
2 cups granulated sugar
2 large eggs
2 teaspoons vanilla extract
sugar for rolling
Mix the flour, cocoa powder, baking soda and salt together in a bowl and set aside.
In the bowl of an electric mixer on medium speed beat the butter and sugar together until light and fluffy, roughly 2 minutes. Beat in the eggs and vanilla until combined, then reduce the mixer speed to low and slowly add in the flour mixture. Beat until just combined.
Form the dough into a disk and wrap with plastic wrap. Refrigerate for about an hour until firm.
Preheat the oven to 350°. Shape the dough into 1¼ inch balls and roll each ball in the sanding sugar. Place on a cookie sheet lined with parchment paper. Bake for 10-12 minutes, or until the cookies are set. They will still look a bit gooey when removed from the oven. Cool on a wire rack for 5 minutes then remove from the cookie sheet and cool completely.
Thursday, October 28, 2010
Baked Stuffed Apples
This is a dessert that I was able to get my skinny mini husband to eat!!
These baked apples where a wonderful way to finish off a meal in the fall. They aren't heavy or too filling. I drizzled mine with a bit of caramel but the filling is sweet enough that you don't need to. Adding a dollop of whipped cream or ice cream would be yummy too.
Oh, and I added raisins to ours. Yum.

Baked Stuffed Apples
Source: The Family Kitchen
Yield: 4 servings
4 apples (recommended: Fuji or McIntosh)
1 teaspoon lemon juice
2 tablespoon all-purpose flour
3 tablespoons butter
1/4 cup brown sugar
2/3 cup old-fashioned oats
1/4 cup chopped pecans or almonds (I used walnuts)
1/2 teaspoon ground cinnamon
1/3 cup maple syrup
Slice the top of each apple off, then hollow the center of the apples out with a paring knife. Brush lemon juice across the top of the apples to keep them from turning brown. Place the apples in a baking dish.
In a large bowl, combine flour, butter, sugar, oats, pecans, and cinnamon. Use a fork to combine until the mixture resembles coarse crumbs. Spoon the mixture generously into each apple. Drizzle each with maple syrup.
Place about 1/4 inch of water into the bottom of the baking dish. Bake in an oven preheated to 350 degrees for 35-40 minutes, or until the crumble on top of the apples is golden brown, and the apples are soft.
Friday, October 15, 2010
Chocolate Peanut Butter Puffs
Need a dessert in a pinch? This is perfect. These are super dreamy and they come together so quickly. Just pick up some puff pastry and by the time you are home it might be thawed enough for use. Or just put it in the fridge in the morning and make these at night.
Make sure to serve these warm. The peanut butter and chocolate are all gooey and delicious.

Chocolate Peanut Butter Puffs
Source: Joy the Baker
Yield: A dozen or so?
1 sheet puff pastry, thawed and rolled out just slightly
1/3 to 1/2 cup creamy peanut butter
1/3 cup chocolate chunks or chips
water for brushing the edges of the pastry
cream or half and half for brushing the tops of the pastry
granulated sugar for sprinkling on top of the pastry
Preheat oven to 400 degrees F.
Thaw frozen puff pastry in the the fridge. When no longer frozen gently roll out puff pastry on a well floured surface, extending the puff pastry about an inch on all sides.
Fold the puff pastry in half like a book to create a crease. Cut along the crease with a pizza slicer to divide the puff pastry in half. Stack the two halves, then slice the pastry into two sheets of 18 even squares. Remove the top squares from the bottom squares and set them aside for later.
Using a small spoon, dollop a small amount (about a heaping 1/2 teaspoon) of peanut butter into the center of 18 of the puff pastry squares. Top each mound of peanut butter with about 5 chocolate chips.
Using a pastry brush (or your finger if you don’t have a brush) dampen the edges of each square with a bit of water. Top each square with another pastry square and use a fork to crimp and seal the edges of the pastry. Make sure the edges are well sealed or all the filling goodness will pop out during baking.
Place filled and sealed pastry squares on a foil lined and lightly greased baking sheet. Brush each square with cream and sprinkle generously with granulated sugar.
Bake the squares for 8 to 12 minutes or until they are perfectly golden. Remove from the oven and allow to cool for 5 minutes before serving warm.
Thursday, September 30, 2010
Chocolate Zucchini Cake
Really I should have posted this earlier when zucchini was in abundance. I feel like the crop is dwindling at this point.
If you do have a massive zucchini kicking around and you aren't sure what to do with it, make this. Make this for your friends. Make this for your coworkers. People love this cake.
I brought this over to another couple's house for a dinner. I should have just said it was a chocolate bundt cake because the husband wasn't so sure about eating a cake with zucchini in it. He ate it. He enjoyed it. But I think he was a little freaked that it had a vegetable in it. That is what makes it healthy! DUH!
1/2 cup cocoa
2 1/2 teaspoons baking powder
1 1/2 teaspoons baking soda
1 teaspoon salt
1 teaspoon cinnamon
3/4 cup soft butter
2 cups sugar
3 eggs
2 teaspoons vanilla
2 teaspoons grated orange peel
2 cups coarsely shredded zucchini
1/2 cup milk
1 cup chopped walnuts or pecans
Glaze (directions follow)
Preheat the oven to 350°F.
Combine the flour, cocoa, baking powder, soda, salt, and cinnamon; set aside.
With a mixer, beat together the butter and the sugar until they are smoothly blended. Add the eggs to the butter and sugar mixture one at a time, beating well after each addition. With a spoon, stir in the vanilla, orange peel, and zucchini.
Alternately stir the dry ingredients and the milk into the zucchini mixture, including the nuts with the last addition.
Pour the batter into a greased and flour-dusted 10-inch tube pan or bundt pan. Bake in the oven for about 50 minutes (test at 45 minutes!) or until a wooden pick inserted in the center comes out clean. Cool in pan 15 minutes; turn out on wire rack to cool thoroughly.
Drizzle glaze over cake.
Glaze: Mix together 2 cups powdered sugar, 3 Tablespoons milk, and 1 teaspoon vanilla. Beat until smooth.
Cut in thin slices to serve.
If you do have a massive zucchini kicking around and you aren't sure what to do with it, make this. Make this for your friends. Make this for your coworkers. People love this cake.
I brought this over to another couple's house for a dinner. I should have just said it was a chocolate bundt cake because the husband wasn't so sure about eating a cake with zucchini in it. He ate it. He enjoyed it. But I think he was a little freaked that it had a vegetable in it. That is what makes it healthy! DUH!
Chocolate Zucchini Cake
Source: The Food Librarian
Yield: 12 servings
1/2 cup cocoa
2 1/2 teaspoons baking powder
1 1/2 teaspoons baking soda
1 teaspoon salt
1 teaspoon cinnamon
3/4 cup soft butter
2 cups sugar
3 eggs
2 teaspoons vanilla
2 teaspoons grated orange peel
2 cups coarsely shredded zucchini
1/2 cup milk
1 cup chopped walnuts or pecans
Glaze (directions follow)
Preheat the oven to 350°F.
Combine the flour, cocoa, baking powder, soda, salt, and cinnamon; set aside.
With a mixer, beat together the butter and the sugar until they are smoothly blended. Add the eggs to the butter and sugar mixture one at a time, beating well after each addition. With a spoon, stir in the vanilla, orange peel, and zucchini.
Alternately stir the dry ingredients and the milk into the zucchini mixture, including the nuts with the last addition.
Pour the batter into a greased and flour-dusted 10-inch tube pan or bundt pan. Bake in the oven for about 50 minutes (test at 45 minutes!) or until a wooden pick inserted in the center comes out clean. Cool in pan 15 minutes; turn out on wire rack to cool thoroughly.
Drizzle glaze over cake.
Glaze: Mix together 2 cups powdered sugar, 3 Tablespoons milk, and 1 teaspoon vanilla. Beat until smooth.
Cut in thin slices to serve.
Thursday, September 23, 2010
Zucchini Whoopie Pies
I did it! I found a fabulous zucchini whoopie pie recipe. I tried to make up my own recipe by altering a muffin recipe. Nope. That didn't work very well. Then I found this old recipe in my binder, and by old I mean over 10 years old. I didn't realize my recipe binders were that old!!
Seth and I were invited to his coworkers party a month or so ago. I offered to bring a treat and one of the girls wanted something with pumpkin. I said it wasn't quite pumpkin season so I decided on zucchini. Now, Seth is a retail manager so he tends to work with younger people. We went to the party and boy did I feel old. Seth was the only male and the girls were around 20-24. There was a lot of giggling and lot of shots. I remember those days.
God I'm old.
Anyway. These whoopie pies were a hit. I filled them with my own filling but if you wanted to do a cream cheese filling you could do that too. Yum!

Zucchini Whoopie Pies
Source: I dunno...the binder?
Yield: A dozen or so
1 cup grated zucchini
1 cup white sugar
1 t baking soda
1 t baking powder
1/2 cup shortening
1 egg
2 cups plus 2 T flour
1 t vanilla
1 t cinnamon
1/2 t cloves
1/2 t salt
1/2 cup milk
Preheat oven to 375.
Mix zucchini, sugar, shortening and egg. Sift all the dry ingredients and add to the zucchini mixture alternating with the milk. Mix until smooth. Bake 8-10 minutes. Fill with your favorite whoopie pie filling.
Thursday, September 9, 2010
M&M Ice Cream
In Maine, we had a heat wave at the end of August. Being 32 weeks pregnant...that wasn't fun. Not at all. I had really been hoping that fall was around then corner and then we had 5 days of 95 degree weather. Ick.
My hopes of making soups and pumpkin whoopie pies turned into thoughts of ice cream. I wanted something creamy and dreamy so I chose this vanilla ice cream and added M&Ms. Yes. This helps.
M&M Ice Cream
Source: Adapted from David Lebovitz
Yield: 8 or so servings
2 cups heavy cream
1 cup whole milk
3/4 cup sugar
pinch of salt
1 vanilla bean, split lengthwise
6 large egg yolks
3/4 tsp. vanilla extract
1 cup frozen M&Ms
Warm the milk, sugar, 1 cup of cream and salt in a medium saucepan. Scrape the seeds from the vanilla bean into the warmed milk, and then add the bean itself. Cover the pan, remove from the heat, and let steep for 30 minutes.
Pour the remaining 1 cup cream into a large bowl, and set a mesh strainer over the top. In a separate bowl, whisk the egg yolks. Slowly add the warm milk mixture into the egg yolks, whisking constantly, and then scrape back into the saucepan.
Stir the mixture constantly over medium heat with a heatproof spatula or wooden spoon, scraping the bottom as you stir, until the mixture thickens and coats the spatula (don’t boil!). Pour the custard through the strainer and stir it into the cream. Add the vanilla bean to the custard, stir in the vanilla extract, and then stir until cool over an ice bath.
Chill the mixture in your refrigerator. When ready to churn, remove the vanilla bean and churn according to the manufacturer’s instructions. When the ice cream is nearly done add frozen M&Ms.
My hopes of making soups and pumpkin whoopie pies turned into thoughts of ice cream. I wanted something creamy and dreamy so I chose this vanilla ice cream and added M&Ms. Yes. This helps.
M&M Ice CreamSource: Adapted from David Lebovitz
Yield: 8 or so servings
2 cups heavy cream
1 cup whole milk
3/4 cup sugar
pinch of salt
1 vanilla bean, split lengthwise
6 large egg yolks
3/4 tsp. vanilla extract
1 cup frozen M&Ms
Warm the milk, sugar, 1 cup of cream and salt in a medium saucepan. Scrape the seeds from the vanilla bean into the warmed milk, and then add the bean itself. Cover the pan, remove from the heat, and let steep for 30 minutes.
Pour the remaining 1 cup cream into a large bowl, and set a mesh strainer over the top. In a separate bowl, whisk the egg yolks. Slowly add the warm milk mixture into the egg yolks, whisking constantly, and then scrape back into the saucepan.
Stir the mixture constantly over medium heat with a heatproof spatula or wooden spoon, scraping the bottom as you stir, until the mixture thickens and coats the spatula (don’t boil!). Pour the custard through the strainer and stir it into the cream. Add the vanilla bean to the custard, stir in the vanilla extract, and then stir until cool over an ice bath.
Chill the mixture in your refrigerator. When ready to churn, remove the vanilla bean and churn according to the manufacturer’s instructions. When the ice cream is nearly done add frozen M&Ms.
Thursday, August 26, 2010
Strawberry Shortcake
This is a dessert that my husband will eat!! My father used to make this hot milk cake when we were kids and it is the perfect base for a shortcake. It is low fat, sweet, and luscious. Oh, and really easy to whip up. I top it with strawberries and fat free cool whip for Seth. I like mine with fresh whipped cream of course!
Top yours with blueberries, raspberries, blackberries, or just eat it plain!
Hot Milk Cake
Source: Better Homes and Garden
Yield: about 16 servings
1 cup all-purpose flour
1 teaspoon baking powder
2 eggs
1 cup sugar
1/2 cup milk
2 tablespoons butter or margarine
Grease a 9x9x2-inch baking pan; set pan aside. Stir together flour and baking powder; set aside.
In a mixing bowl beat eggs with an electric mixer on high speed about 4 minutes or until thick. Gradually add sugar, beating on medium speed for 4 to 5 minutes or until light and fluffy. Add the dry mixture; beat on low to medium speed just until combined.
In a small saucepan heat and stir milk and butter until butter melts; add to batter, beating until combined. Pour batter into the prepared pan.
Bake in a 350 degree F oven for 20 to 25 minutes or until a wooden toothpick comes out clean. Cool cake in pan on a wire rack. Makes 9 servings.
Top yours with blueberries, raspberries, blackberries, or just eat it plain!
Hot Milk CakeSource: Better Homes and Garden
Yield: about 16 servings
1 cup all-purpose flour
1 teaspoon baking powder
2 eggs
1 cup sugar
1/2 cup milk
2 tablespoons butter or margarine
Grease a 9x9x2-inch baking pan; set pan aside. Stir together flour and baking powder; set aside.
In a mixing bowl beat eggs with an electric mixer on high speed about 4 minutes or until thick. Gradually add sugar, beating on medium speed for 4 to 5 minutes or until light and fluffy. Add the dry mixture; beat on low to medium speed just until combined.
In a small saucepan heat and stir milk and butter until butter melts; add to batter, beating until combined. Pour batter into the prepared pan.
Bake in a 350 degree F oven for 20 to 25 minutes or until a wooden toothpick comes out clean. Cool cake in pan on a wire rack. Makes 9 servings.
Monday, August 23, 2010
Chocolate Peanut Butter Peanut Butter Cup Ice Cream
Long name. Amazing results. Whose commercial is that?? I can't remember but as I was typing the title for this post I thought of that commercial.
This is chocolate ice cream. Plus peanut butter. Plus peanut butter cups. You heard me. This was amazing.
I find no reason to buy ice cream when you can make it at home. Some of the stuff in the store is cheaper but the quality of homemade ice cream is supreme. Plus you know what is in there!
I wish I had a big bowl of this right now.
Chocolate Peanut Butter Peanut Butter Cup Ice Cream
Source: Adapted from Joelens Blog
Yield: 8 or so servings? but I'm pregnant so it served me like twice. Ha!
2 cups half & half
1/4 cup unsweetened cocoa powder
1/2 cup granulated sugar
pinch of salt
1/2 cup smooth peanut butter
1/2 cup peanut butter cups, frozen and chopped
In a large pan, whisk to combine the half and half, cocoa powder, sugar and salt. Heat the mixture, whisking frequently, until it comes to a full, rolling boil and begins to foam up. Remove the pan from the heat and add the peanut butter, whisking to blend thoroughly.
Refrigerate the mixture to chill thoroughly, then freeze it in your ice cream maker according to the manufacturer’s instructions. After churning, fold in the candies into the ice cream and transfer mixture into a freezer safe container. Freeze overnight to ripen before serving.
This is chocolate ice cream. Plus peanut butter. Plus peanut butter cups. You heard me. This was amazing.
I find no reason to buy ice cream when you can make it at home. Some of the stuff in the store is cheaper but the quality of homemade ice cream is supreme. Plus you know what is in there!
I wish I had a big bowl of this right now.
Chocolate Peanut Butter Peanut Butter Cup Ice CreamSource: Adapted from Joelens Blog
Yield: 8 or so servings? but I'm pregnant so it served me like twice. Ha!
2 cups half & half
1/4 cup unsweetened cocoa powder
1/2 cup granulated sugar
pinch of salt
1/2 cup smooth peanut butter
1/2 cup peanut butter cups, frozen and chopped
In a large pan, whisk to combine the half and half, cocoa powder, sugar and salt. Heat the mixture, whisking frequently, until it comes to a full, rolling boil and begins to foam up. Remove the pan from the heat and add the peanut butter, whisking to blend thoroughly.
Refrigerate the mixture to chill thoroughly, then freeze it in your ice cream maker according to the manufacturer’s instructions. After churning, fold in the candies into the ice cream and transfer mixture into a freezer safe container. Freeze overnight to ripen before serving.
Monday, July 12, 2010
Whoopie!
Some of my friends and I were discussing our favorite summertime treats. I said one of mine is a frozen whoopie pie. Yes. Frozen. That creamy filling is delightful frozen. Just one of the things I learned from my momma!!
Speaking of my momma, I had been using her recipe (or her mothers?) for the cake part of the whoopie pie. It would turn out flat nearly every time. I decided that it was time to try something else. I looked around, took tour through my binders, and landed on a recipe from Hannaford Supermarket's Fresh Magazine. I think it was last year that they did a special on whoopie pies and included original, pumpkin, peanut butter, and reverse...which I loved.
These were wonderful. I did make a half batch of the filling to test it out but found that I like my mother's filling better. I will certainly make these again.

Classic Whoopie Pies
Source: Hannaford Fresh Magazine
Yield: 12ish?
1 1/2 cup butter, divided, room temperature
3/4 cup packed dark brown sugar
2 eggs
3 cups flour
3/4 cup unsweetened cocoa powder
2 teaspoon baking soda
1 teaspoon Salt
11/2 cup buttermilk
2 1/2 teaspoon vanilla extract, divided
1/2 teaspoon instant powdered coffee
23/4 cup confectioners` sugar
3 cup Marshmallow creme
Preheat oven to 350 degrees F. Coat two baking sheets with cooking spray or line with parchment paper and set aside.
In a large mixing bowl, use an electric mixer on medium speed to mix 3/4 cup of butter (1 1/2 sticks) butter and brown sugar until well blended, about 3 minutes. Add eggs, one at a time, mixing until smooth after each egg.
In a separate bowl, stir together flour, cocoa powder, baking soda and salt; set aside. In a 2-cup liquid measuring cup, stir together buttermilk, 1 1/2 tsp. vanilla, and instant coffee until coffee is dissolved (this may take a minute or so); set aside.
Add half the flour mixture to the butter mixture and mix on medium speed until smooth, scraping down mixing bowl with a rubber spatula. Add half the buttermilk mixture and mix again on medium speed until smooth and slightly fluffy in texture. Repeat with remaining flour and buttermilk, and mix until smooth. Batter will be thick and slightly springy when done.
Drop 2-Tbsp. portions of batter onto prepared baking sheets, leaving 2 inches between each portion to allow for spreading. Bake 11 to 13 minutes, until puffed and set but still soft when touched lightly with fingertips. Let cakes cook for 3 minutes on baking sheets before transferring them to wire racks to finish cooling, about 15 to 20 minutes. Repeat with remaining batter.
Prepare filling while cakes are baking and cooling. In a large mixing bowl, use an electric mixer on medium speed to mix 3/4 cup of butter (1 1/2 sticks) and 1 tsp. vanilla until creamy. Add half the confectioners' sugar and mix on low first to combine, then on high until smooth. Add remaining confectioners' sugar and mix again. Scrape down sides with a rubber spatula. Add marshmallow creme and mix on medium high until filling is smooth and fluffy, about 3 to 4 minutes.
Assemble whoopie pies. Spoon filling onto the flat sides of half the cakes, dividing it evenly. Top with remaining cakes, flat side against the filling, rounded side up. Serve immediately, or wrap and store at room temperature for up to two days, or in freezer for up to two months.
Subscribe to:
Posts (Atom)